To fix a broken car key loop, first protect the electronics, then choose a cover, reinforced epoxy repair, replacement shell, or professional replacement based on the damage. A fitted key-fob cover is fastest, while an aftermarket shell swap usually gives the cleanest low-cost result; epoxy is mainly a temporary repair for undamaged electronics.
Key Facts at a Glance
- A car key loop is the eyelet that connects a key fob to a keyring or lanyard.
- A tight TPU or silicone cover can restore attachment without opening the fob.
- A replacement shell normally keeps the original circuit board, battery, and programmed electronics.
- A detached transponder chip can prevent the engine from starting after a shell swap.
- Typical DIY material costs range from $5-$40, while a complete dealer key commonly costs $150-$500 or more.
- Never drill, cut, heat, or grind the fob housing while the battery or circuit board remains inside.
What Is a Car Key Loop and Why Does It Break?
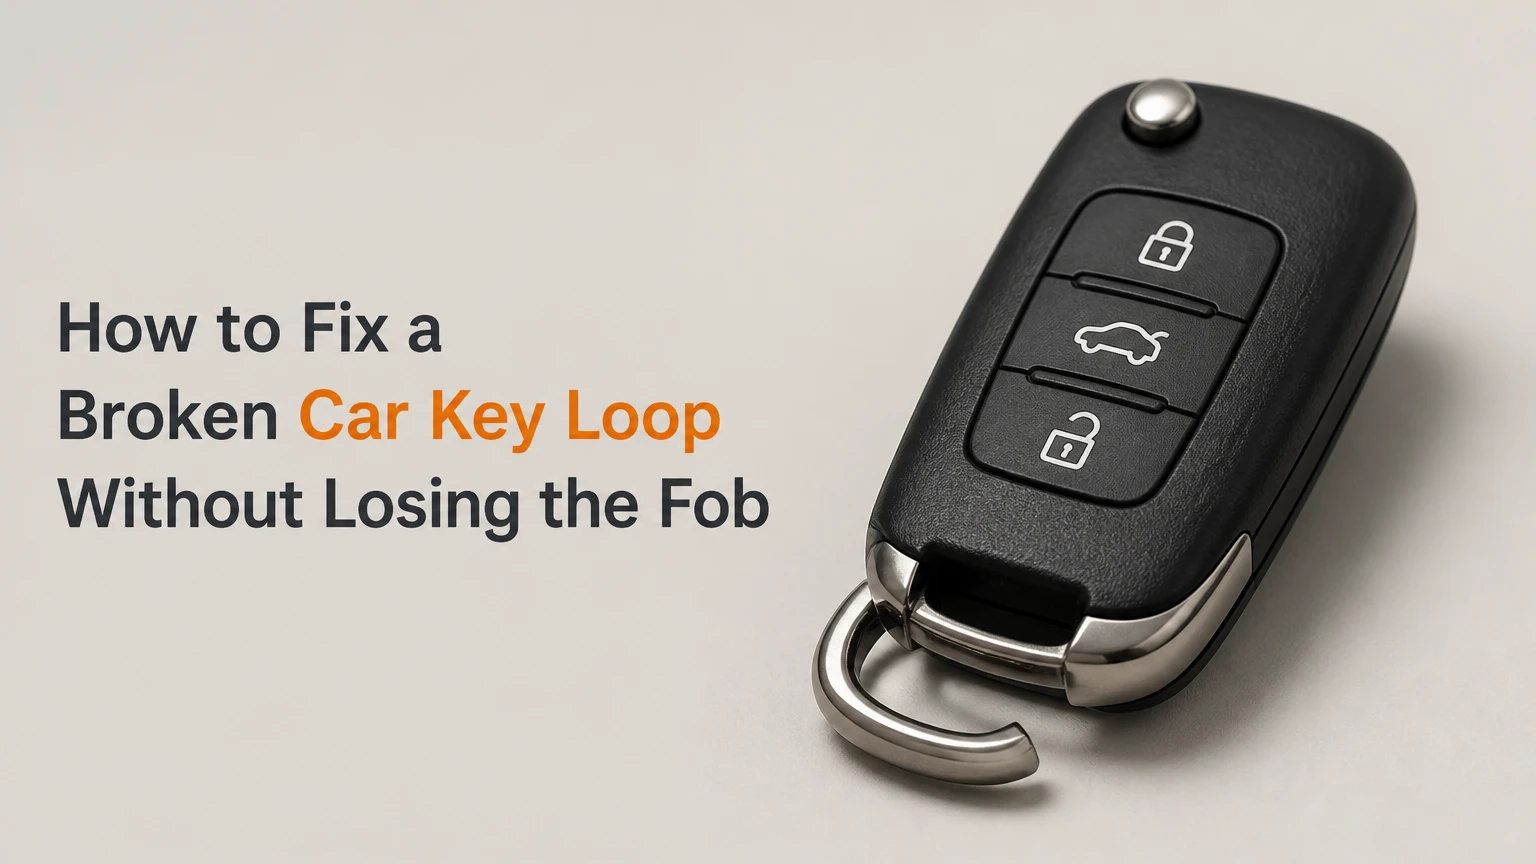
A car key loop is the molded plastic or metal-reinforced eyelet at the end of a remote key fob. The eyelet carries the pulling and twisting force from the keyring, while the circuit board, battery contacts, buttons, and immobilizer components remain inside the housing.
Most loops fail at one of four locations: the narrow neck where the eyelet joins the case, the hinge beside a flip key, a screw post near the housing edge, or a seam weakened by a previous drop. Heavy keys create repeated bending rather than one simple pull, so a loop can crack gradually before separating.
Common causes include:
- A large ring containing house keys, tools, access cards, or bottle openers
- Repeated drops onto concrete or vehicle floors
- UV exposure and heat that make older plastic less flexible
- Skin oils, cleaners, and solvents that degrade certain plastics
- A loose ring that twists the eyelet sideways
- A prior repair that bonded only to a smooth outer surface
A loop does not protect the radio transmitter or immobilizer by itself. Its practical purpose is load management: it keeps the keyring force on the housing rather than transferring that force through a button, circuit-board edge, or battery compartment.
Which damage can be repaired?
A hairline crack with most of the original eyelet present is the easiest case for reinforcement. A completely missing loop requires a wire anchor, replacement housing, or external cover, while a split housing, exposed circuit board, water damage, or damaged key blade usually justifies professional evaluation.
Inspect the fob under a bright light. Check whether the case halves still close, whether the battery compartment is intact, and whether any buttons are loose. Photograph the fob before opening it so every internal part has a reference position.
How to Fix Broken Car Key Loop Damage Safely
The safest repair sequence is to identify the damage, remove the electronics before structural work, roughen compatible plastic, reinforce the attachment mechanically, and test the finished loop with a light load. Do not rely on a glue-only joint when the fob carries a heavy ring or an expensive proximity key.
Before You Start
| Requirement | Typical specification | Why it matters |
|---|---|---|
| Work time | 20-45 minutes | Covers disassembly and repair |
| Epoxy cure time | 12-24 hours | Structural strength develops during curing |
| Difficulty | Basic hand-tool skill | Small parts and alignment require care |
| Isopropyl alcohol | 70% or higher, 5-10 mL | Removes oils before bonding |
| Sandpaper | 180-400 grit, one 50 x 50 mm piece | Creates a mechanical key |
| Wire anchor | 1-1.5 mm stainless or galvanized wire | Transfers load through the repair |
| Epoxy | 2-part structural epoxy, 5-15 g | Builds the outer reinforcement |
| Tools | Plastic pry tool, tweezers, cutters, gloves | Reduces case and component damage |
Work on a clean, dry surface away from the vehicle. Keep the original key available because a failed repair can leave you without a usable spare.
Step 1: Identify the Fob and Photograph the Internals
Match the replacement shell or cover by vehicle year, model, button count, blade style, and FCC or part number when available. Photograph the battery orientation, rubber button mat, circuit board position, and any loose black transponder capsule before separating the case.
You will know it worked when: you can identify every removable part and its original orientation.
Common mistake: ordering by appearance alone. Two keys for the same model year can use different blade hinges, board layouts, or proximity-key housings.
Step 2: Remove the Battery and Electronics
Open the case along its factory seam with a plastic pry tool. Remove the coin-cell battery, rubber button membrane, circuit board, and any separate transponder capsule before drilling, sanding, or applying adhesive.
Use tweezers for small chips and avoid scraping the board. Place components in a labeled tray, not on a metal workbench where a battery can short against loose tools.
You will know it worked when: no battery, PCB, button membrane, or loose immobilizer chip remains near the repair area.
Common mistake: assuming the transponder is always integrated into the circuit board. Some older keys use a separate glass or black plastic capsule, and leaving it in the old shell can make the repaired key crank without starting.
Step 3: Prepare the Broken Housing
Remove loose plastic and square off unstable edges with a file. Sand a bonding area extending at least 8-10 mm around the break, then clean it with isopropyl alcohol and allow it to dry completely.
Do not sand the circuit board or use alcohol on delicate labels unless the manufacturer permits it. Many common fob shells use ABS or polycarbonate, which structural epoxy can grip after abrasion. Polypropylene and polyethylene resist ordinary epoxy and may need a plastic-specific adhesive or a new shell instead.
You will know it worked when: the surface looks uniformly matte and feels dry, with no glossy plastic or oily residue at the bond area.
Common mistake: applying epoxy to a polished, contaminated surface. The repair may appear solid but peel away under the first sideways twist.
Step 4: Install a Mechanical Wire Anchor
Form 1-1.5 mm wire into a U or closed omega shape that follows the intended loop. Leave two legs long enough to embed 5-8 mm into the thick housing edge, and make the ring opening large enough for the actual keyring.
Create shallow channels with a small hand file, or use a pin vise only after confirming the housing is empty. Avoid open flames and avoid melting wire into plastic because heat can distort the case, release fumes, or damage nearby labels.
Dry-fit the wire before mixing adhesive. The wire should sit below the outer surface, with at least 2 mm of housing material around each anchor leg.
You will know it worked when: the wire remains stationary when you apply light finger pressure from several directions.
Common mistake: making the wire eyelet too small. A tight ring concentrates force at one point and accelerates another fracture.
Step 5: Apply and Shape the Epoxy
Mix equal parts of a compatible 2-part structural epoxy according to its label, usually for 60-120 seconds. Pack epoxy around both wire legs and extend the reinforcement 8-12 mm onto the intact housing, but keep the battery door, case seam, buttons, and blade hinge clear.
Shape the outside with a disposable tool. Do not add a large lump merely to increase strength; excess material can prevent the shell from closing or interfere with a cover.
You will know it worked when: the wire is fully surrounded, the case seam remains clear, and the repaired loop has a smooth passage for the ring.
Common mistake: using cyanoacrylate, commonly called super glue. It forms a brittle joint under twisting loads and can wick into seams, buttons, or a battery door.
Step 6: Cure, Reassemble, and Test Gradually
Leave the empty housing undisturbed for the full label cure time, typically 12-24 hours at approximately 20-25°C. Cold temperatures slow curing, and early handling can produce a joint that feels hard while remaining weak internally.
Reinstall the transponder, PCB, button membrane, and battery in their photographed positions. Confirm battery polarity and close the case evenly without forcing the seam.
Test the loop with a staged load:
- Hang a lightweight lanyard for 10 minutes.
- Add the keyring and one ordinary key for 10 minutes.
- Inspect the wire, epoxy, housing, and seam before normal use.
You will know it worked when: the loop shows no movement, whitening, crack propagation, or separation after the staged test, and every button operates normally.
Common mistake: testing immediately with a full keychain. A failed repair can drop the fob, and the impact can damage electronics even if the loop initially holds.
Which Broken Key Loop Repair Is Best?
A replacement shell is usually the best permanent DIY option, a fitted cover is the safest two-minute solution, and reinforced epoxy is appropriate only when the housing remains sound and the user accepts a temporary or cosmetic repair. Dealer replacement is the right choice when programming, security verification, or lease requirements outweigh cost.
| Repair option | Typical cost | Hands-on time | Usual result | Best use |
|---|---|---|---|---|
| TPU or silicone cover | $10-$25 | 2-5 minutes | Immediate external loop | Intact electronics and intact case |
| Wire and epoxy repair | $5-$15 | 20-40 minutes | Reinforced original housing | Small crack or missing eyelet |
| Aftermarket shell swap | $15-$40 | 20-60 minutes | New outer housing | Functional electronics and damaged case |
| Automotive locksmith repair | $50-$180 | 30-90 minutes | Model-specific repair or key | Valuable, complex, or damaged fob |
| Dealer replacement | $150-$500+ | 1-3 hours, sometimes longer | New cut and programmed key | Lost key, security system, lease rules |
These are typical consumer ranges in the United States, not fixed prices. Luxury brands, proximity keys, regional labor rates, required proof of ownership, and all-keys-lost situations can raise the total substantially.
When is a key-fob cover better than glue?
A key-fob cover is better than glue when the shell is still closed, the loop is only lightly cracked, and the owner needs immediate protection without exposing the electronics. A snug TPU, silicone, leather, or hard-thermoplastic cover transfers the ring load through its own loop.
Choose a cover with openings aligned to every button, the emergency key release, charging port if fitted, and the LED window. A loose cover can catch on clothing and allow the fob to fall through, so the case should require deliberate stretching during installation.
A cover is not a structural repair for a shattered housing. It also adds bulk, may trap moisture around a damaged seam, and can hide a crack that is continuing to spread.
When should you replace the shell?
Replace the shell when the circuit board and immobilizer remain functional but the molded housing, hinge, battery door, or loop is damaged. A shell swap preserves the original programmed board in many designs, so separate remote programming is often unnecessary, but the exact design determines the outcome.
| Shell-swap component | Typical check | Failure consequence |
|---|---|---|
| PCB | Same board shape and button count | Buttons may not align |
| Battery | Same cell type and polarity | Remote may not respond |
| Transponder | Separate capsule transferred | Engine may not start |
| Blade | Existing blade or compatible blank | Key may not turn the lock |
| Rubber membrane | Matching button positions | Buttons may stick |
| Case seam | Even closure around all edges | Water and dust can enter |
A shell swap does not make an uncut blade usable. A locksmith must cut a supplied blank to match the old blade, and some flip-key assemblies require a specific hinge pin or spring.
Does a shell replacement require programming?
A shell replacement often does not require programming when the original circuit board and immobilizer components stay with the vehicle. Programming becomes relevant when the replacement includes a new transmitter, a new transponder, a different board, or a vehicle system that authenticates the complete key assembly.
Remote lock buttons and engine-start authorization are separate functions in many vehicles. A key can lock and unlock doors while still failing to start the engine if the transponder is missing, misplaced, or incompatible.
How to Replace a Car Key-Fob Shell
A shell replacement takes approximately 20-60 minutes and requires transferring every original functional component into a matching empty housing. The most important checks are the transponder location, battery polarity, blade compatibility, and circuit-board alignment.
- Compare the new shell before opening the old one. Check button count, emergency blade slot, screw locations, hinge design, and internal posts.
- Open the old shell carefully. Start at the seam with a plastic tool, then work around the perimeter without bending the PCB.
- Remove the battery and board. Lift from the edges, not from mounted buttons, coils, or soldered components.
- Locate the immobilizer chip. Search for a separate capsule or small black insert near the top of the old housing.
- Move the membrane and chip. Seat them in the exact recesses provided by the replacement shell.
- Transfer or cut the blade. Use the original blade if the hinge matches, or have a locksmith cut the compatible blank.
- Close the housing. Confirm that no wire, membrane edge, or PCB component is trapped in the seam.
- Test every function. Check lock, unlock, trunk, panic, passive entry, ignition, and emergency blade operation.
An aftermarket shell can fit mechanically yet fail electrically if its button plungers sit at a different height. Reopen the case if a button feels harder than the others or the LED does not respond.
What If the Loop Is Only Cracked or Completely Missing?
A partially cracked loop can usually receive an external reinforcement, while a completely missing eyelet needs a wire anchor, protective cover, shell replacement, or professional repair. The correct choice depends on whether the remaining housing has enough thickness to carry a new attachment point.
| Damage condition | Immediate action | Preferred repair | Avoid |
|---|---|---|---|
| Hairline crack | Remove heavy ring | Epoxy fillet or cover | Pull testing at full load |
| Half eyelet remains | Sand and reinforce both sides | Wire-backed epoxy | Glue on one surface |
| Eyelet missing | Protect fob from dropping | Shell, cover, or anchored wire | Drilling with electronics inside |
| Case split near PCB | Stop using the ring | Shell or locksmith repair | Compressing the case tightly |
| Metal insert bent | Inspect surrounding plastic | Metal insert replacement | Straightening while assembled |
| Water-exposed housing | Remove battery immediately | Electronics inspection | Sealing wet components |
Tape can hold a fob temporarily inside a pocket, but tape should not become the permanent load-bearing loop. A temporary lanyard attached around the whole fob is safer than hanging the fob from a weak glued edge.
Common Mistakes and How to Fix Them
Broken key-loop repairs fail most often because the load path, plastic type, or immobilizer components were misunderstood. Recovery is possible in many cases, but a misplaced transponder, punctured battery, or damaged PCB may require a locksmith or dealer.
- Super glue was used. Remove loose adhesive mechanically, roughen the surface, and rebuild with a compatible structural epoxy and wire anchor. Do not flood the seam with solvent.
- The epoxy peeled away. The plastic was likely smooth, oily, contaminated, or incompatible. Rebuild on a larger abraded area, or use a shell replacement for polypropylene or polyethylene.
- The case will not close. Remove excess epoxy, check that the membrane sits in its groove, and verify that the board is on its alignment posts.
- The vehicle will not start. Confirm the original transponder was transferred, the battery is correctly oriented, and no capsule remains in the old shell. If the immobilizer warning remains, obtain vehicle-specific diagnostic help.
- The buttons stopped working. Re-seat the rubber membrane and inspect the board for a shifted button contact. Do not press harder because force can damage the switch.
- The repair broke during testing. Stop using the keyring, remove unstable material, and move to a cover, shell, locksmith repair, or replacement key.
The most dangerous error is drilling blindly through an assembled fob. A drill can puncture a coin-cell battery, sever a PCB trace, or create conductive debris inside the housing.
How Much Does a Broken Car Key Loop Repair Cost?
A broken car key loop typically costs $5-$15 for an epoxy repair, $10-$25 for a protective cover, $15-$40 for a replacement shell, $50-$180 through an independent automotive locksmith, or $150-$500 or more for a new dealer-supplied key. Programming, cutting, shipping, luxury branding, and all-keys-lost service change the final price.
| Service or material | Typical price | Typical duration | Additional charge risk |
|---|---|---|---|
| Structural epoxy kit | $5-$15 | 24-hour cure | Plastic incompatibility |
| Protective cover | $10-$25 | 2-5 minutes | Shipping or model mismatch |
| Empty replacement shell | $15-$40 | 20-60 minutes | Blade cutting |
| Locksmith shell or fob repair | $50-$180 | 30-90 minutes | Diagnostics or travel |
| Standard dealer key | $150-$350 | 1-3 hours | Programming and labor |
| Luxury proximity key | $300-$800+ | 1-3 hours or order time | Security authorization |
Dealers and locksmiths may require registration, title, insurance, or photo identification before cutting or programming a key. Ask whether the quoted price includes the physical key, blade cutting, immobilizer programming, remote synchronization, labor, and taxes.
How Can You Prevent Another Loop Failure?
The most effective prevention is reducing keyring weight and preventing sideways torque at the eyelet. Keep the car fob on a small ring or short lanyard, remove unnecessary metal keys, and inspect the loop whenever the housing shows whitening, a hairline crack, or movement.
Use a fitted cover before the original loop becomes unstable. Avoid attaching the fob to retractable badge reels unless the reel has a rated load and a connector that does not twist the eyelet.
Practitioner rules of thumb improve reliability:
- Keep the fob attached to no more than one or two light keys.
- Replace a cover when its loop stretches, splits, or becomes loose.
- Do not leave a repaired epoxy loop hanging from a belt while carrying a full key bundle.
- Store a spare key separately rather than on the same overloaded ring.
- Inspect the fob after any drop, especially if the case seam opens.
A metal loop is not automatically indestructible. A rigid insert can transmit impact into the surrounding plastic, so inspect both the insert and the housing after a hard fall.
When Should a Locksmith or Dealer Repair It?
Use an automotive locksmith when the fob has a damaged blade, separate transponder, immobilizer warning, cracked circuit board, lost programming, or a high replacement value. Use the dealer when the vehicle requires brand-specific authorization, the key is a complex proximity unit, or a lease contract requires original equipment.
A professional can test the transmitter, identify the transponder type, cut a blade by code or duplication, and program compatible keys. An electronics repair specialist may replace a broken metal eyelet or resolder damaged components, but not every fob has economical repair access.
Professional help is usually unnecessary for a clean shell swap with an intact original board. It becomes cost-effective when one mistake could disable the only working key or when the fob costs several hundred dollars to replace.
FAQ
Can I drive the car if the key-fob loop is broken?
You can usually drive if the key still starts the vehicle and the electronics remain undamaged, but do not leave the fob hanging from an unstable eyelet. Keep it in a pocket or a secure temporary pouch until a cover, shell, or properly cured repair restores attachment.
Will a silicone key cover fix a missing loop?
A silicone key cover can replace the attachment function when the cover fits tightly around an otherwise usable fob. It will not repair a crushed case, exposed circuit board, loose battery door, or damaged immobilizer, and a loose cover can allow the fob to fall out.
Can I use JB Weld on a plastic car key fob?
A 2-part epoxy such as JB Weld can reinforce some ABS or polycarbonate housings after abrasion and degreasing. Adhesion is weaker on polypropylene and polyethylene, so check the plastic and treat wire reinforcement as necessary; epoxy alone is unreliable under repeated sideways loading.
How do I know if my key has a transponder chip?
A transponder may be integrated into the PCB or housed separately as a small glass capsule or black plastic insert. Search the old shell before discarding it, compare the replacement shell instructions, and ask an automotive locksmith if the vehicle uses a proximity or immobilizer system.
Why does the remote work but the engine will not start?
The remote transmitter and engine immobilizer can operate independently. If the buttons work but the engine will not start after a shell swap, check the separate transponder, battery seating, board position, and immobilizer warning light before attempting repeated starts.
Is a replacement key shell better than repairing the original loop?
A replacement shell is generally better when the original electronics work and the housing is badly damaged, because it restores the molded attachment point without exposing the board to adhesive. A cover is faster, while a wire-and-epoxy repair costs less but has greater long-term failure risk.
The Bottom Line
The safest way to fix broken car key loop damage is to use a fitted cover for immediate protection or transfer the original electronics into a matching replacement shell for a cleaner permanent result. Use wire-reinforced epoxy only on a sound, empty housing, cure it for 12-24 hours, and keep the keyring light. For immobilizer, blade, or programming problems, an automotive locksmith is usually the most practical next step.