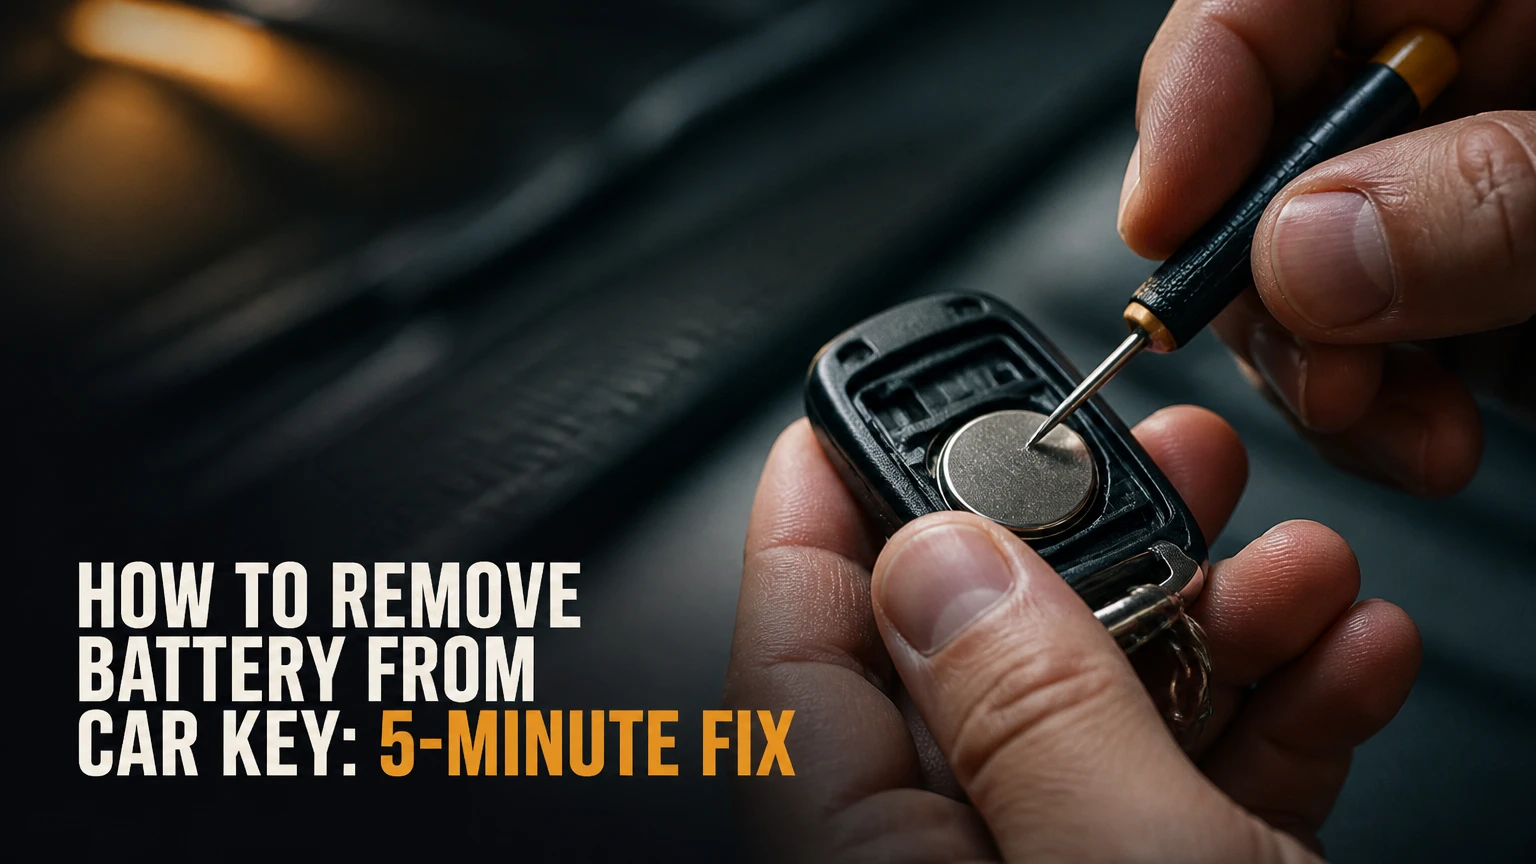
To remove a battery from a car key, release or pry open the key fob housing, expose the coin cell, and slide it away from its retaining clip without bending the contacts. Confirm the replacement number and polarity before installation. Most accessible fobs take 5-10 minutes, but the exact opening point depends on the fob design, not only the vehicle brand.
Key Facts
Most car key fobs use a 3-volt lithium coin cell, commonly CR2032 or CR2025.
The battery number identifies both the cell diameter and its thickness, so CR2032 and CR2025 are not automatically interchangeable.
A dead remote battery usually does not erase the vehicle immobilizer transponder or key programming.
The positive side marked “+” commonly faces outward, but the molded diagram inside the fob is the controlling instruction.
A plastic pry tool is safer than a metal screwdriver near the circuit board and battery contacts.
A typical DIY replacement costs $2-$7 and takes 5-10 minutes when the case has a service notch.
Before You Remove the Key Fob Battery
Prepare the replacement battery, a plastic pry tool, and a clean, well-lit work surface before opening the remote. A precision flathead screwdriver can help with a stubborn case seam, but wrapping its tip with tape reduces cosmetic damage and does not eliminate the risk of shorting or scratching electronics.
| Requirement | Typical specification | Why it matters |
|---|---|---|
| Replacement cell | CR2032, CR2025, CR1632, or CR1620 | Diameter and thickness must match |
| Work time | 5-10 minutes | Includes opening, removal, and testing |
| DIY battery cost | $2-$7 | Typical retail price for one or a multipack |
| Plastic pry tool | 1 tool, 1-3 mm tip | Reduces scratches and electrical contact |
| Precision screwdriver | 1 small flathead | Useful for a marked case notch |
| Workspace | Dry, bright, uncluttered | Prevents lost clips, springs, and screws |
Remove the key ring and set the vehicle key aside if possible. Keep the old and new batteries separated from children and pets because lithium button cells can cause severe injury if swallowed. Do not puncture, crush, heat, recharge, or place a coin cell in loose metal objects.
Which Fob Design Do You Have?
Identify the housing before prying because each design opens at a different location. A hidden-key smart fob has a removable emergency blade, an integrated-key remote has a visible fixed blade, and a flip key exposes the blade only after pressing a release button.
| Fob design | Recognition feature | Usual opening location | Common battery access |
|---|---|---|---|
| Hidden-key smart fob | Emergency blade slides from rear | Slot inside key cavity | Rear cover or circuit-board side |
| Integrated-key clicker | Metal blade remains attached | Side or top seam notch | Metal retaining clips |
| Flip key | Blade folds into housing | Recessed slot beside folded blade | Circular battery well |
| Sealed rechargeable fob | No service seam or coin-cell door | Manufacturer-specific | Service replacement or charging system |
Your vehicle make, model, and year narrow the possibilities, but they do not guarantee one battery design. Mid-cycle model changes, regional specifications, trim levels, and replacement fobs can produce different housings. Read the number printed on the existing cell, inspect the inside cover, or consult the owner’s manual before buying a replacement.
How to Remove Battery From Car Key
The general removal sequence is to release the mechanical key, find the molded pry point, separate the housing evenly, and free the coin cell from its clip. Work around the designed notch rather than forcing the widest part of the case, because concentrated pressure at the wrong point breaks plastic retaining tabs and leaves the fob unable to close securely.
Step 1: Remove the Emergency Key or Fold Out the Blade
Remove the emergency blade when the fob has a sliding release, or press the flip-key button so the blade moves out of its recess. The exposed key often reveals the opening slot that remains hidden when the blade is stored.
Checkpoint: You will know this step worked when the key blade is fully clear or fully extended and you can inspect the cavity without pressing buttons on the circuit board.
Common mistake: Do not use the blade as a lever against the outer decorative face. The emergency key is designed to operate the door lock, while the molded cavity usually provides a separate pry point.
Step 2: Find the Case Notch, Screw, or Release
Inspect the perimeter for a small indentation, arrow, molded battery symbol, or screw. Check beneath a removable logo badge, rubber plug, or key-blade insert if the two halves show no obvious seam.
Some fobs use a captive screw, commonly a small Phillips or Torx fastener, rather than snap clips. Remove the screw into a tray, then separate the case at the seam. A smooth, welded-looking housing may be sealed and unsuitable for routine home opening.
Checkpoint: The correct entry point has a seam that opens slightly with light, controlled pressure.
Common mistake: Do not insert a tool deeply. A pry tool that travels more than a few millimeters can contact the circuit board, antenna, rubber button membrane, or battery terminals.
Step 3: Separate the Housing at the Designed Point
Insert the plastic tool into the notch and twist gently, using a small rotational movement rather than levering upward over a long distance. Once the first clip releases, move around the perimeter and release the remaining clips one at a time.
Hold the fob over a table because a loose rubber membrane, spring, transponder capsule, or small screw may fall out. Do not separate the halves with a sudden pull if a mechanical key return spring or tether remains attached.
Checkpoint: The cover separates evenly and the buttons remain seated in their original positions.
Common mistake: Forcing a resistant case usually means the tool is in the wrong location, a hidden screw remains installed, or the housing is sealed. Stop and inspect again.
Step 4: Photograph the Battery Orientation
Before touching the battery, photograph the cell, spring contacts, and circuit-board position. Record which face shows the “+” mark and whether the battery slides under one clip before lifting over another.
The positive terminal is the broad, marked face on most coin cells. The negative terminal is usually the less-marked underside. Battery polarity is determined by the fob’s contact layout, so the positive face does not universally point in the same physical direction across every manufacturer.
Checkpoint: Your photograph clearly shows the battery number, the marked face, and the direction of the retaining clip.
Common mistake: Do not assume the old battery was installed correctly. Verify the polarity diagram molded into the housing or printed on the circuit board.
Step 5: Release the Coin Cell From Its Retaining Clip
Use a plastic pick or fingernail to push the battery toward the spring opening, then lift the accessible edge over the retaining lip. If a metal tool is unavoidable, touch only the battery edge and avoid bridging the positive and negative terminals.
Never pry against the circuit board or bend the contact tabs upward. The tab must retain the new cell with light, continuous pressure, not clamp it so tightly that the battery cannot slide into position.
Checkpoint: The old battery comes out without a bent clip, scratched board, or torn membrane.
Common mistake: Pulling directly upward against a retaining clip can deform the clip. Slide the cell in the direction indicated by the open side of the holder.
Step 6: Install and Test the New Battery
Place the replacement cell in the same orientation as the verified photograph and the fob’s polarity marking. Press the battery down until it sits flat under the retaining lip, then reinstall the membrane, circuit board, cover, screw, and emergency key in reverse order.
Press each case half together around the perimeter. Test lock, unlock, trunk, panic, and passive-entry functions before attaching the fob to a key ring.
Checkpoint: The housing closes flush, buttons have normal travel, and the vehicle responds from a normal operating distance.
Common mistake: Do not test by holding the battery loosely against the contacts. A temporary connection can make a weak installation appear successful.
Which Battery Fits Your Car Key?
The correct coin cell must match the original designation, terminal arrangement, and physical fit. CR2032, CR2025, CR1632, and CR1620 cells are all nominally 3 volts, but their thickness and diameter differ, so substituting a thinner or smaller cell can cause intermittent contact or a loose fit.
| Battery | Diameter | Thickness | Typical nominal voltage | Common key-fob use |
|---|---|---|---|---|
| CR2032 | 20 mm | 3.2 mm | 3 V | Toyota, Honda, Ford, GM, Nissan |
| CR2025 | 20 mm | 2.5 mm | 3 V | Mazda, Mercedes-Benz, Volkswagen |
| CR1632 | 16 mm | 3.2 mm | 3 V | Smaller smart keys, some Toyota and Lexus |
| CR1620 | 16 mm | 2.0 mm | 3 V | Some Audi, Subaru, and Suzuki fobs |
The four-digit code is dimensional: the first two digits describe the approximate diameter in millimeters, while the last two describe thickness in tenths of a millimeter. A CR2025 can fit inside a holder designed for CR2032, but the 0.7 mm difference may reduce contact pressure and shorten reliable operation.
Can You Use a Different Coin Cell?
Use a different battery only when the fob manufacturer explicitly lists it as compatible and the holder maintains firm contact. Do not stack two thinner cells to imitate one thicker battery, because the arrangement can create unsafe contact, incorrect voltage, or a loose assembly.
A branded cell is not automatically required, but fresh lithium cells from established manufacturers are preferable to unmarked cells with uncertain storage history. Check the expiration date, package integrity, and voltage rating. Do not install a rechargeable LIR2032 in a fob designed for a non-rechargeable CR2032 unless the manufacturer specifically designed the circuit for it.
What Changes for Each Key Fob Type?
Hidden-key smart fobs, integrated-key remotes, and flip keys use the same basic coin-cell principle but different case-opening routes. The vehicle badge does not identify the route reliably, so the physical housing should guide the procedure.
| Fob type | Removal route | Typical difficulty | Main failure risk |
|---|---|---|---|
| Hidden emergency key | Slide blade out, pry inside cavity | Low to medium | Missed release slot or broken clips |
| Integrated blade | Open side notch, lift membrane | Low | Torn button membrane |
| Flip key | Extend blade, pry inside recess | Low to medium | Damaged hinge or spring |
| Premium sealed fob | Follow manufacturer service method | Medium to high | Housing or rechargeable pack damage |
Hidden-Key Smart Fobs
Slide the rear release, remove the emergency key, and locate the rectangular slot inside the empty blade channel. Insert a plastic tool or the key tip into that slot and twist gently until the rear cover releases.
The battery may sit in the rear cover or beneath a circuit-board assembly. If the board must move, lift it only after noting its orientation and avoid pulling on antenna contacts or flexible connectors.
Integrated-Key Clickers
Look for a notch along the top or side seam, often opposite the attached metal blade. Twist a plastic pry tool in the notch, then work around the seam until the cover releases.
Some older remotes place a rubber button membrane over the board. Lift the membrane by its edge, keep the buttons aligned, and slide the coin cell from the metal holder rather than pulling against the board.
Flip Keys
Press the release button to extend the blade, then inspect the recessed area where the blade folds. A small notch inside that recess commonly opens the rear panel.
Flip-key housings can contain a spring mechanism that controls blade movement. Keep the halves level, and do not rotate the blade hinge while the case is open. Reassemble the spring and blade before closing the housing.
What Should You Do If the Case Will Not Open?
Stop applying force when a car key fob case will not open after light pressure. The most likely causes are a hidden screw, an unremoved emergency blade, an incorrect pry location, or a sealed housing, and each requires a different response.
Check these points in order:
- Inspect both sides for a screw under a badge, plug, or rubber cover.
- Remove the sliding emergency key completely.
- Search the blade recess for an internal notch.
- Run a plastic pick around the seam for a missed clip.
- Compare the housing with the vehicle owner’s manual.
- Stop if the seam appears heat-welded, glued, or permanently sealed.
A sealed rechargeable fob is not equivalent to a coin-cell remote. Some BMW, Mercedes-Benz, Porsche, and other premium keys use rechargeable internal packs or manufacturer-specific service construction. Cutting such a housing open can destroy the antenna, immobilizer transponder, or water-resistant seal.
How Much Does Battery Replacement Cost?
A standard DIY replacement typically costs $2-$7 and takes 5-10 minutes. A retailer may charge for the cell but provide installation, while a locksmith or dealer costs more when the fob requires specialized tools, a sealed housing, or a complete replacement.
| Replacement route | Typical battery or service cost | Typical time | Best use case |
|---|---|---|---|
| DIY coin cell | $2-$7 | 5-10 minutes | Accessible snap-case fob |
| Auto-parts retailer | $5-$15 | 5-15 minutes | Correct cell and basic help |
| Automotive locksmith | $10-$30 | 10-20 minutes | Damaged case or uncertain fit |
| Dealership service | $15-$50 | 15-45 minutes | Premium, sealed, or documented service |
| Complete replacement fob | $50-$500+ | 30 minutes to several days | Broken electronics or lost key |
Costs vary by country, vehicle brand, and whether programming is included. A battery change normally does not require key programming, so ask for a battery-only price before authorizing a replacement remote.
Should You Use a Dealer or Locksmith?
Use a dealer for a sealed rechargeable fob, a high-cost proximity key, or a key that already has damaged housing. Use an automotive locksmith for a conventional coin-cell fob when the case is difficult to open or the replacement requires testing.
An auto-parts store is often the lowest-cost option for a common CR2032 or CR2025, but employee assistance varies by location and model. DIY is appropriate only when the case has a clear service seam and the owner can identify the battery without forcing components.
Does a New Battery Erase Key Programming?
Replacing the coin cell usually does not erase the immobilizer key code or remote identity. The immobilizer transponder and the remote’s stored programming are separate functions in many vehicles, although a few models may require a resynchronization sequence after prolonged loss of power.
Remote locking and engine authorization are different systems. A fob can stop locking the doors while the vehicle still starts because the passive transponder does not depend on the same coin-cell circuit.
If buttons fail after replacement, first check polarity, battery fit, contact pressure, case alignment, and accidental membrane displacement. Consult the owner’s manual for a model-specific resynchronization procedure before assuming that programming was lost.
Can You Start a Car With a Dead Key Fob?
Most modern vehicles provide an emergency-start method for a dead key-fob battery, but the location differs by manufacturer. Common arrangements include holding the fob against the start button, placing it in a marked console slot, or using the emergency blade to unlock the driver’s door.
| Vehicle system | Common emergency action | Battery still needed? | Verification source |
|---|---|---|---|
| Push-button start | Hold fob against start button | No for transponder start | Owner’s manual |
| Console reader | Place fob in marked tray | No for transponder start | Owner’s manual |
| Key ignition | Insert mechanical key | No for door lock; varies for start | Owner’s manual |
| Passive entry | Use blade for entry, reader for start | No for emergency start on many models | Owner’s manual |
Do not rely on a generic internet sequence for a specific vehicle. Emergency readers, start-button locations, and blade-lock covers differ even between years of the same model.
Troubleshooting After Installing the Battery
A car key fob that remains unresponsive after a battery change usually has a polarity, contact, seating, or case-alignment problem rather than lost programming. Reopen the housing and inspect the physical installation before attempting any reset procedure.
| Symptom | Likely cause | Corrective action | Escalation point |
|---|---|---|---|
| No buttons work | Reversed cell or dead new cell | Match “+” marking and test another cell | Test fob electronics |
| Works only nearby | Weak cell or flattened contact | Install fresh cell and restore pressure | Inspect antenna |
| One button fails | Misaligned membrane | Reseat rubber membrane and buttons | Replace membrane or case |
| Case will not close | Cell not under clip | Reposition cell flat in holder | Check wrong thickness |
| Car warning remains | Vehicle warning delay | Drive and follow manual reset | Dealer diagnosis |
| Car will not start | Immobilizer or vehicle fault | Use emergency reader location | Locksmith or dealer |
If the Fob Works Intermittently
Remove the cover and check whether the battery moves under light finger pressure. A cell that rattles, sits at an angle, or loses contact when a button is pressed needs correct seating, not a stronger battery.
Flattened contacts can sometimes be lifted by a fraction of a millimeter with a plastic pick, but do not repeatedly bend spring metal. Contact fatigue or a cracked solder joint requires electronic repair or fob replacement.
If the Battery Warning Remains
Some vehicles update the low-battery warning only after the ignition is switched on, the engine starts, or the fob communicates with the vehicle. Follow the owner’s manual procedure and allow one normal drive cycle before diagnosing a continuing warning.
A warning that persists with a verified fresh cell can indicate excessive parasitic drain, a damaged fob, or a vehicle receiver fault. A battery installed backward can also prevent the fob from transmitting while leaving the dashboard message unchanged.
If the Fob Was Wet
Remove the battery immediately if water entered the housing, then leave the case open in a dry location. Do not use a high-temperature hair dryer, apply electrical spray, or reinstall power while moisture remains on the board.
Corrosion can continue after the fob appears dry. A water-damaged proximity key should be inspected by an automotive locksmith or dealer because corrosion around the antenna and transponder may cause delayed failure.
Practitioner Rules That Prevent Damage
Three practical rules prevent most failed battery changes:
- Photograph before removal. A ten-second image preserves polarity, clip direction, button placement, and board orientation.
- Push before lifting. Most retaining clips release when the cell slides toward the open side; vertical force bends the clip.
- Test before final closure. Confirm every button while the halves are lightly joined, then close the case completely.
A metal screwdriver is useful for case separation but is a poor battery-handling tool. The main risk is not the 3-volt battery itself. The risk is bridging contacts, scraping a conductive trace, or bending a spring terminal that was calibrated for a specific cell thickness.
The battery number is also a mechanical specification. Replacing CR2032 with CR2025 may produce a temporary success because both cells measure 3 volts, but reduced thickness can create intermittent contact when the fob is carried in a pocket.
Frequently Asked Questions
How long does a car key battery usually last?
A car key battery typically lasts 2-4 years, although heavy passive-entry use, frequent button presses, extreme temperatures, and a damaged case can shorten that period. A fob stored close to the vehicle may communicate more often on some passive systems, which can increase consumption.
Can I touch a coin-cell battery with my fingers?
Brief contact with the insulated edge is normally acceptable, but avoid contaminating both broad terminals with oily fingers. Hold the cell by its edge, keep it away from loose metal objects, and wash hands after handling if the cell leaks or has visible damage.
Do I need to replace batteries in both car keys?
Replace the second key battery when it is the same age and has similar range loss, especially if both fobs were purchased or used at the same time. Test the second fob first, then replace only the cell that shows weak operation if its performance remains normal.
Why does my car key work after I squeeze the case?
Squeezing the case can temporarily restore contact between a loose coin cell and its metal terminal. The underlying fault is usually the wrong battery thickness, a flattened retaining clip, a cracked holder, or a case that no longer clamps the cell securely.
Can a locksmith replace a key-fob battery without programming it?
A locksmith can usually replace a standard coin cell without programming because battery replacement and immobilizer programming are separate operations. Programming may be necessary only if the remote has a separate fault, the fob is replaced, or the vehicle-specific procedure requires resynchronization.
The Bottom Line
To remove battery from car key safely, identify the fob design, open the housing at its intended notch, photograph the original polarity, and slide the cell out from its retaining clip without bending the contacts. Install the exact replacement number, test every function, and stop if the housing is sealed, rechargeable, swollen, wet, or unusually expensive to replace.