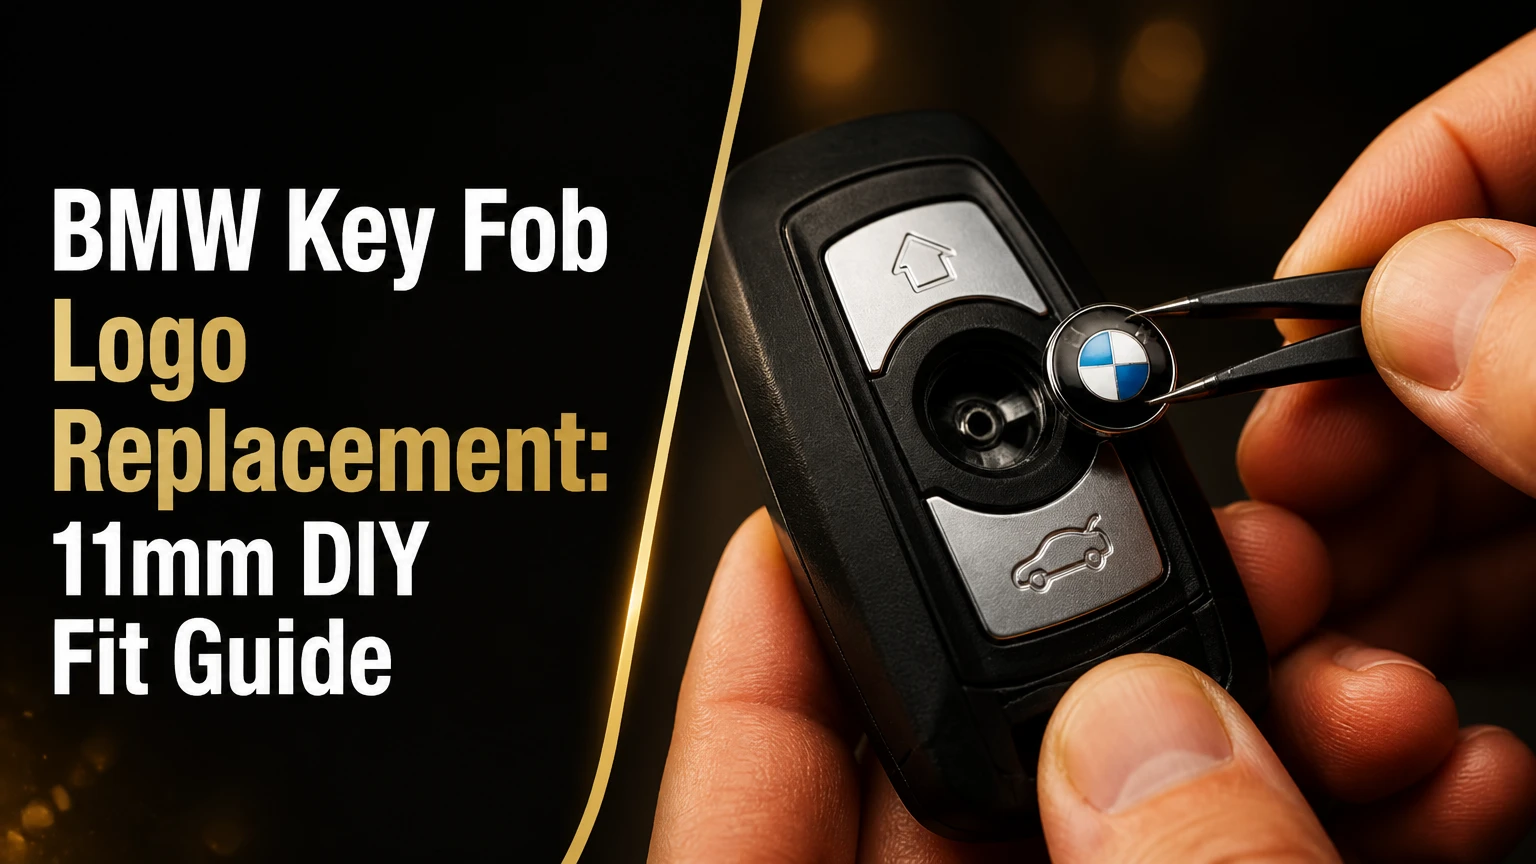
BMW key fob logo replacement usually involves fitting an approximately 11 mm roundel onto the remote’s recessed emblem area. The repair takes about 15-30 minutes and normally requires a replacement badge, isopropyl alcohol, and a precision pry tool. Measuring the old recess matters because BMW used several fob shapes and button profiles.
Key Facts at a Glance
- An 11 mm BMW roundel is common on many key fobs, but 11 mm is not a guaranteed fit for every BMW remote.
- Genuine BMW emblem part numbers commonly associated with small key badges include 66-12-2-155-753 and 66-12-2-155-754.
- Self-adhesive aluminum or resin stickers usually cost about $5-$10 for a multi-pack.
- A bare metal emblem often needs a separate flexible adhesive because many genuine replacements do not include tape.
- Super glue is a poor choice because cyanoacrylate can fog plastic, cure brittle, and run into button mechanisms.
- A clean, dry, correctly shaped recess determines adhesion more than the emblem’s brand.
What Does BMW Key Fob Logo Replacement Involve?
BMW key fob logo replacement means removing the damaged roundel or remaining metal disk, cleaning the recess, and installing a correctly sized BMW emblem. The roundel may be decorative, or it may form the central lock-button surface, depending on the remote design.
The visible badge is not the same component as the remote shell, circuit board, battery, transponder, or key blade. A replacement sticker repairs appearance and, on some diamond-style remotes, restores the surface pressed by the user. It does not repair a failed microswitch, broken housing, weak battery, or damaged Comfort Access transmitter.
A common mistake is ordering a complete key fob case when only the badge has worn away. The opposite mistake also occurs: installing a badge on a shell whose button hinge or plastic recess is already broken. Inspect the housing before buying parts.
Is 11 mm a universal BMW key fob size?
No. Approximately 11 mm is a common replacement size for many BMW key fobs, especially older remotes, but “universal” listings can conceal differences in diameter, thickness, curvature, and adhesive backing. Measure the exposed recess with a ruler or caliper before ordering.
Measure the circular seating area, not the outside diameter of a badge that is still attached. If the old emblem has a raised metal rim, remove it first or account for that rim when checking the replacement height. A badge can match the diameter and still fail because it is too thick for the lock button.
Which BMW Key Fob Parts and Materials Are Available?
BMW key fob emblems generally fall into four purchasing categories: genuine metal roundels, aftermarket aluminum stickers, resin or epoxy domed stickers, and complete replacement shells. The correct category depends on whether the original badge is missing, whether the button moves underneath it, and whether the plastic housing remains sound.
| Replacement type | Typical price | Thickness or profile | Adhesive requirement |
|---|---|---|---|
| Genuine BMW metal emblem | $10-$15 each | Rigid, low-profile metal | Often separate glue |
| Aluminum adhesive sticker | $5-$10 per 2-4 | Thin, flat metal face | Pre-applied tape |
| Resin or epoxy roundel | $5-$12 per 2-4 | Raised, domed profile | Pre-applied adhesive |
| Complete key shell | $15-$60 | Shell-specific | Usually supplied parts |
Prices are typical online retail ranges in the United States and exclude shipping. Dealer pricing, regional taxes, discontinued stock, and model-specific shells can change the total. A replacement emblem is inexpensive, but a wrong part can cost more after return shipping and delays.
Genuine BMW emblem or aftermarket sticker?
A genuine BMW emblem is the better choice for original appearance and material consistency, while an aftermarket self-adhesive sticker is usually the easier and lower-risk repair. The aftermarket option is preferable when the recess is flat and the objective is a fast cosmetic restoration.
| Criterion | Genuine BMW metal | Aluminum sticker | Resin or epoxy sticker | Complete shell |
|---|---|---|---|---|
| Typical unit cost | $10-$15 | $2-$5 | $2-$6 | $15-$60 |
| Surface profile | Rigid and thin | Thin and flexible | Raised dome | Varies by shell |
| Separate adhesive | Usually yes | No | No | Usually no |
| Fit tolerance | Low if curved | Moderate | Moderate | Shell-specific |
| Installation time | 20-30 minutes | 15-20 minutes | 15-20 minutes | 30-90 minutes |
| Main risk | Glue or button interference | Edge lifting | Excess thickness | Poor electronics transfer |
| Best application | Restoration | Flat recess repair | Cosmetic gloss finish | Cracked housing |
A metal emblem is not automatically superior. On a lock button with a shallow concave surface, a rigid disk can rock, bind, or leave an edge unsupported. A thin adhesive emblem often conforms better and reduces the chance of restricted button travel.
Which adhesive should you use?
Use 3M automotive emblem adhesive or another flexible, plastic-compatible trim adhesive for a bare metal BMW roundel. B-7000 or E6000 can work when applied sparingly, but the adhesive must remain inside the emblem footprint and away from the button perimeter.
Avoid cyanoacrylate, commonly sold as super glue. The adhesive can release vapor that leaves a white haze on glossy plastic, cures into a brittle joint that fails when keys are dropped, and wicks into the gap around a moving lock button. Thin liquid glue is especially risky.
Double-sided automotive tape is suitable only when it can be cut cleanly to the emblem’s diameter without overlapping the button edge. Thick mounting foam tape is usually unsuitable because it raises the logo and changes button travel.
Which BMW Key Shapes Accept an 11 mm Roundel?
BMW key fob shape provides a useful first compatibility check, but model year alone does not guarantee fitment. The same vehicle generation can have different remotes for market, options, replacement history, and keyless-entry equipment.
| Key style | Common BMW examples | Logo function | Main fitment concern |
|---|---|---|---|
| Diamond-shaped remote | E46, E39, E53 X5 | Often lock-button surface | Curvature and button travel |
| Rectangular older remote | E60, E90 variants | Decorative or separate button | Recess diameter and thickness |
| Angular F-Series remote | F10, F30, F15 | Often lock-button surface | Concave center and edge clearance |
| Display Key | Many G-Series, i8, selected 7 Series | Usually rear decoration | Nonstandard profile and expensive housing |
Older diamond-shaped BMW remotes frequently use the roundel as the central locking surface. Press the center before installation and observe whether the surface moves vertically or rocks on a hinge. The replacement must not bridge the surrounding plastic rim.
Rectangular remotes with separate lock and unlock buttons are less sensitive if the badge is purely decorative. They still require a clean, flat mounting area, and an overly thick resin badge can rub against a case cover or prevent the remote from lying flat.
F-Series remotes often have a concave logo area. A flexible sticker usually fits that contour more reliably than a rigid metal disk. Display Keys require special caution because their rear emblem may differ in diameter and thickness from a conventional remote badge.
How do you measure a BMW key fob logo recess?
Measure the recess across its widest point in millimeters, then measure the available depth or compare the replacement’s thickness with the old emblem. A digital caliper gives the best result, but a millimeter ruler can identify whether an advertised 11 mm part is plausible.
Check four points:
- Diameter of the clean circular recess.
- Height of the surrounding plastic rim.
- Depth available above the moving button.
- Curvature across the mounting surface.
Do not rely only on a listing title such as “fits all BMW keys.” Compare photographs of the rear of the replacement, confirm the seller’s measured diameter, and check the return policy. A listing that specifies only vehicle models but gives no dimensions provides weak fitment evidence.
How Do You Replace a BMW Key Fob Logo?
BMW key fob logo replacement takes 15-30 minutes for a simple sticker repair and requires four practical stages: remove the old badge, clean the surface, test-fit the new emblem, and apply controlled pressure. The most important factor is complete removal of old adhesive without damaging the plastic recess.
Before You Start
| Requirement | Typical specification |
|---|---|
| Time | 15-30 minutes |
| Difficulty | Low for a badge, moderate for a shell |
| Replacement quantity | 1 emblem, plus 1 spare if inexpensive |
| Cleaning material | 70% or higher isopropyl alcohol |
| Tools | Plastic pry pick, cotton swabs, lint-free cloth |
| Optional tool | Hair dryer on low heat, 20-30 seconds |
| Adhesive | 3M emblem adhesive, B-7000, or E6000 |
| Work condition | Dry room, approximately 18-27°C |
Keep the key away from spilled alcohol and do not saturate seams, openings, or the display. Isopropyl alcohol evaporates quickly, but liquid can still enter a housing if applied directly rather than to a swab.
Step 1: Remove the Existing Emblem
Protect the key shell with a thin plastic pry pick, then lift the old emblem from its outer edge. Work around the circumference in small movements instead of twisting forcefully at one point.
If the badge is firmly bonded, warm the area with a hair dryer on low for 20-30 seconds from several inches away. The plastic should feel only mildly warm. Do not use a heat gun, open flame, or concentrated heat because the shell can deform and the internal battery or electronics can be damaged.
You will know the step worked when the entire emblem, including any thin metal backing plate, has been removed. A common mistake is peeling away only the printed face and leaving a metal disk behind, which creates a raised and unstable mounting surface.
Step 2: Clean the Recess Completely
Apply isopropyl alcohol to a cotton swab and dissolve old adhesive residue from the center and perimeter. Rotate to a clean swab as residue transfers, then allow the plastic to dry for at least two minutes.
Do not scrape aggressively with a steel screwdriver. Deep scratches can expose uneven plastic, reduce contact area, and make a new badge sit at an angle. For stubborn residue, use a plastic pick with shallow strokes parallel to the surface.
You will know the surface is ready when it feels smooth and shows no glossy adhesive patches under direct light. The surface must be dry, dust-free, and free from hand oil before the new adhesive touches it.
Step 3: Test-Fit and Align the Replacement
Place the replacement emblem into the recess without removing its adhesive liner. Confirm that the logo is centered, the outer edge clears the surrounding plastic, and the button moves through its full travel.
Align the BMW lettering according to the key’s normal orientation, usually horizontal when the key blade points downward. Test-fit twice before exposing adhesive because repositioning a pressure-sensitive adhesive after contact can weaken its bond.
You will know the fit is correct when the emblem sits level and the lock button clicks or depresses exactly as it did before installation. A badge that rocks, catches, or protrudes above the rim needs a different profile or a replacement shell.
Step 4: Apply the New Emblem
Peel the backing from a self-adhesive emblem without touching the adhesive surface. Lower the roundel straight down, center it once, and press across the face with a clean fingertip for approximately 30 seconds.
For a bare metal emblem, apply one very small amount of flexible emblem adhesive to the center, not a continuous bead around the edge. Keep glue away from the moving button gap. Hold the emblem in place for 60-90 seconds, then leave the key undisturbed for the adhesive manufacturer’s recommended cure period.
You will know the installation is successful when the badge remains centered, the edges are firmly seated, and the button returns immediately after pressing. Do not repeatedly test a freshly glued emblem because movement can break the early bond.
Step 5: Cure and Test the Key
Leave a glued emblem for 12-24 hours before attaching the key to a crowded key ring. A pressure-sensitive sticker normally reaches useful handling strength quickly, but a cold or contaminated surface can require longer before exposure to abrasion.
Press the lock surface 10 times and check for consistent travel. Test the other buttons, inspect the badge from the side, and confirm that the key shell closes fully if the remote has a removable rear cover.
What Are the Most Common Installation Mistakes?
The most common BMW key fob emblem failures involve wrong thickness, incomplete cleaning, excessive adhesive, and incorrect identification of the damaged component. Each problem has a different remedy, so adding more glue is rarely the correct first response.
| Symptom | Likely cause | Immediate remedy | Permanent solution |
|---|---|---|---|
| Logo falls off | Oil, residue, cold surface | Remove and clean again | Apply at 18-27°C |
| Lock button sticks | Glue entered the gap | Stop pressing repeatedly | Clean inside or replace shell |
| Badge sits high | Old backing plate remains | Remove badge and inspect | Reinstall on bare plastic |
| Logo rocks | Rigid part on curved recess | Remove before curing | Use flexible sticker |
| Edge lifts | Wrong diameter or weak tape | Press only if still fresh | Replace with correctly sized part |
| Plastic looks cloudy | Cyanoacrylate vapor | Ventilate and stop use | Replace damaged shell if needed |
What should you do if the lock button sticks?
Stop pressing the key when a newly installed badge restricts the lock button. Excess adhesive may have entered the button gap, and repeated operation can spread it farther into the switch or membrane.
If the glue is still soft, remove the emblem carefully and wipe accessible residue with a lightly dampened alcohol swab. Do not flood the button. If the button remains stuck after the badge is removed, the shell may need to be opened or replaced, and the circuit board should be protected from solvent.
A stuck button is not evidence that the BMW remote needs programming. Programming cannot correct a mechanically obstructed button.
Why does a replacement emblem fall off?
A replacement roundel usually falls off because the substrate contained old adhesive, skin oil, dust, moisture, or condensation. Temperature also matters: applying pressure-sensitive tape below approximately 18°C can produce a weak initial bond.
Clean the surface again, allow it to dry, and install a new emblem at room temperature. Do not reuse a lifted sticker if dust has contacted its adhesive. Warming the emblem slightly in your hand can improve conformability, but direct high heat can damage the plastic and adhesive.
Can you replace the logo without opening the key?
Yes. A badge-only repair normally requires no case opening, battery removal, coding, or immobilizer programming. Opening the key becomes relevant only when the housing is cracked, the button mechanism is damaged, glue has entered the interior, or a complete shell replacement is necessary.
When Is a Complete Key Shell Better?
A complete replacement shell is better when the original housing is cracked, the button membrane is torn, the emblem recess is missing, or the key blade mount is loose. A new badge cannot restore broken plastic or a failed switch.
| Condition | Badge-only repair | Complete shell |
|---|---|---|
| Logo missing, shell intact | Appropriate | Unnecessary |
| Surface scratched but level | Appropriate | Optional cosmetic choice |
| Button sticks from broken plastic | Insufficient | Usually appropriate |
| Housing cracked near seam | Temporary at best | Appropriate |
| Circuit board works, shell worn | Possible | Appropriate if transferable |
| Lost key or dead transmitter | Insufficient | Requires key-specific solution |
Transferring electronics into a replacement shell requires matching the shell to the exact remote layout. Some shells require moving the transponder, circuit board, battery contacts, or blade, and poor handling can make the vehicle fail to recognize the key. A shell is not automatically a programmed replacement key.
How Much Does the Repair Cost and How Long Does It Take?
A badge-only repair typically costs $5-$15 and takes 15-30 minutes, while a complete shell repair commonly costs $15-$60 and takes 30-90 minutes. Dealer-supplied complete keys cost substantially more because they include vehicle-specific security programming.
| Repair path | Parts cost | Labor time | Programming |
|---|---|---|---|
| Aftermarket sticker | $5-$10 | 15-20 minutes | No |
| Genuine metal emblem | $10-$15 | 20-30 minutes | No |
| Sticker plus adhesive | $8-$20 | 20-30 minutes | No |
| Replacement shell | $15-$60 | 30-90 minutes | Usually no |
| New programmed key | Often $150-$500+ | Varies by dealer | Yes |
These figures are typical planning ranges, not fixed quotes. A BMW dealer, automotive locksmith, or independent repair shop may charge different amounts based on region, key generation, and whether the vehicle still has a working spare.
How Should You Buy the Correct Replacement?
Buy by measured diameter, profile, and remote shape rather than by BMW model name alone. Verify whether the package contains a self-adhesive sticker, a bare emblem, a complete shell, or only a decorative cover.
Before ordering, confirm:
- Measured diameter in millimeters.
- Emblem thickness or profile.
- Flat, concave, or curved mounting surface.
- Adhesive included and already applied.
- Compatibility with the exact remote photograph.
- Seller return policy.
- Quantity included in the package.
- Whether the part is genuine BMW or aftermarket.
BMW parts listings commonly associate 66-12-2-155-753 and 66-12-2-155-754 with small key emblems, but part-number fitment should still be checked against the vehicle’s remote. BMW part catalogs and retailer databases can differ by market and supersession history.
A genuine part number does not guarantee that the emblem includes adhesive. Check the package description and inspect product photographs. Some listings use “replacement emblem” for the metal disk, while others use the same phrase for a peel-and-stick overlay.
Expert Rules That Prevent Repeat Repairs
A thin emblem is safer than a thick emblem on a moving button. The badge must preserve the original clearance around the switch. A visually attractive domed resin logo can interfere with the case or change the feel of the lock button.
Adhesive area matters more than adhesive volume. A large bead does not create a stronger repair when the substrate is contaminated. It increases seepage risk and can immobilize the button.
The old emblem may have two layers. Some failed badges lose their printed or coated face while leaving a metal backing disk attached. Always inspect the recess at a low angle before installing the replacement.
A badge repair cannot fix electronic symptoms. If the vehicle does not respond, first distinguish a mechanical button problem from a depleted battery, damaged circuit board, synchronization issue, or vehicle-side fault. The logo is cosmetic hardware, even when it covers a lock button.
FAQ
Does BMW sell the key fob logo separately?
BMW has supplied small replacement key emblems through parts channels, with listings commonly associated with part numbers 66-12-2-155-753 and 66-12-2-155-754. Availability varies by market and key generation. Confirm the diameter, profile, and adhesive arrangement before treating a catalog match as guaranteed fitment.
Can a BMW key fob logo be repaired with double-sided tape?
A BMW key fob logo can be repaired with thin automotive-grade double-sided tape when the mounting area is flat and the tape fits entirely within the emblem footprint. Avoid thick foam tape, household tape, and any material that overlaps the moving button gap or raises the badge above the shell.
Will replacing the emblem affect BMW Comfort Access?
Replacing the exterior emblem normally does not affect BMW Comfort Access because the repair does not alter the antenna, battery, circuit board, or transponder. A thick badge can cause mechanical interference, but it cannot restore a dead battery or repair a damaged keyless-entry transmitter.
Can you use a BMW hood or wheel-center badge on a key fob?
A BMW hood or wheel-center badge should not be substituted automatically for a key fob emblem. Larger badges use different diameters, thicknesses, curvature, and backing systems. Only use one after measuring the key recess and confirming that the replacement clears the button and case.
Should you replace the whole BMW key when the logo is damaged?
Replace only the logo when the shell, buttons, blade mount, and electronics work normally. Choose a complete shell when plastic is cracked, the button mechanism is broken, or the emblem recess cannot provide a level bonding surface. A new programmed key is unnecessary for a cosmetic badge failure.
The Bottom Line
BMW key fob logo replacement is usually a low-cost, no-programming repair that takes 15-30 minutes. Start by measuring the recess, with approximately 11 mm serving as a common reference rather than a universal guarantee. Choose a thin self-adhesive emblem for most flat or concave surfaces, or use a tiny amount of flexible emblem adhesive for a bare genuine metal roundel. Clean the plastic completely, protect button travel, and replace the shell instead when the housing itself is damaged. These steps produce a more reliable BMW key fob logo replacement than choosing a badge by model name alone.