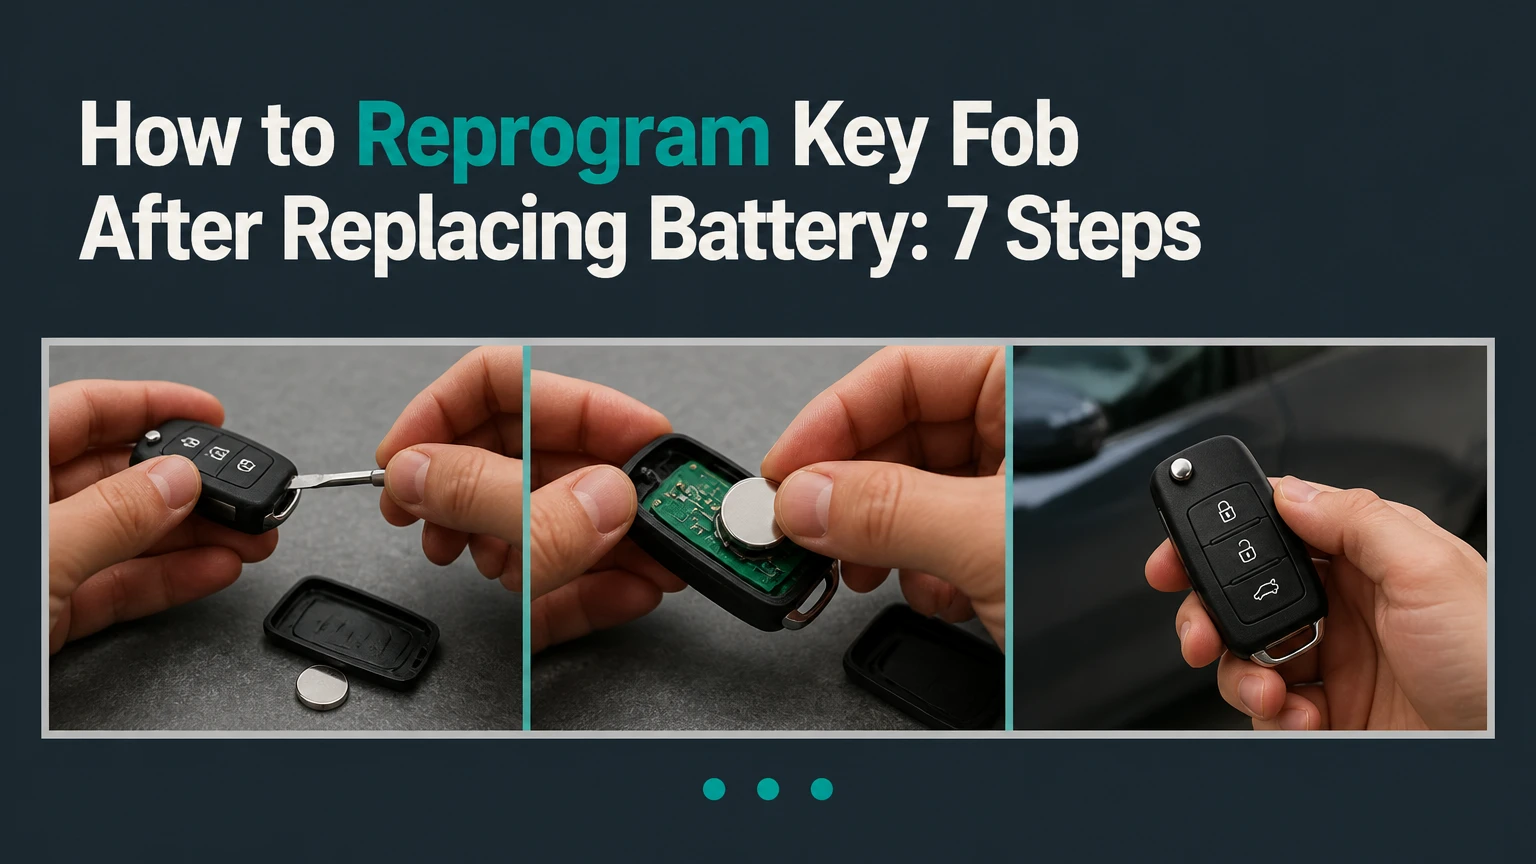
A car key fob usually does not need reprogramming after a battery replacement, because removing power normally does not erase its stored identity. If the remote stopped communicating, use the vehicle-specific synchronization sequence, typically involving the ignition, door locks, or a smart-fob backup slot. The exact procedure depends on the vehicle’s make, model, year, and key system.
Key facts at a glance
A correctly replaced CR2032 or CR2025 battery usually preserves the fob’s programming.
Remote-button synchronization does not necessarily program the immobilizer chip that allows the engine to start.
Many manual procedures erase previously stored remotes, so bring every working fob to the vehicle.
Generic ignition sequences are not universal; the factory owner’s manual is the controlling reference.
Typical manual pairing takes 2-10 minutes and costs nothing, while locksmith programming commonly costs $50-$150.
A dead smart-fob battery may still allow starting through a backup slot or designated sensor location.
Does a New Battery Require Reprogramming?
Replacing a key-fob battery normally does not require reprogramming. The fob’s transmitter identity and rolling-code counter are stored in nonvolatile memory, so a brief loss of power should not delete them.
Reprogramming becomes relevant when the vehicle and remote lose synchronization, the replacement battery was installed incorrectly, the fob was repeatedly pressed while out of range, or the remote is new or previously paired to another vehicle. Some vehicles automatically resynchronize after one or more lock-button presses near the car. Others require a formal programming mode.
A key fob has two separate functions that owners often confuse. The lock, unlock, trunk, panic, and remote-start buttons use radio communication with a receiver. The immobilizer transponder uses a separate security system, often operating through a short-range antenna around the ignition switch or start button. One can work while the other fails.
First identify the symptom
| Symptom after battery replacement | Most likely cause | First action |
|---|---|---|
| No buttons work, car starts normally | Battery, polarity, contacts, or synchronization | Recheck battery and try the vehicle procedure |
| Lock and unlock work, engine will not start | Immobilizer or transponder issue | Use the spare key and arrange key programming |
| Only one button fails | Worn switch, damaged circuit, or vehicle setting | Test every button and inspect the circuit board |
| Remote works beside the car only | Weak battery, poor contacts, or receiver fault | Install the specified battery and clean contacts |
| Smart fob is not detected | Dead battery or backup-reader issue | Use the emergency starting location |
How Key-Fob Synchronization Works
A key fob sends an encrypted radio message containing its identity and a button command to the vehicle’s receiver. The receiver checks that message against the vehicle’s stored security data before operating the locks or another permitted function.
Most modern remotes use a rolling-code system. The fob and vehicle maintain related code sequences, and accepted button presses advance that sequence. A short period without a battery does not normally reset either memory. However, repeated button presses while the fob is far from the vehicle can advance the fob’s counter without advancing the vehicle’s counter, which may require resynchronization.
The battery replacement itself is therefore less often the cause than the installation or the timing around it. A CR2032 battery installed upside down, covered by shipping film, or held away from a dirty spring contact produces the same symptom as an unprogrammed remote.
Remote pairing and immobilizer programming are different
Remote pairing teaches the body-control module or keyless-entry receiver to accept the fob’s button signals. Immobilizer programming authorizes the transponder chip to permit engine operation. An OBD diagnostic tool, security PIN, or dealer-level procedure may be required for the second task even when the first task is available manually.
| Key system | Primary function | Typical replacement cost | Typical programming route |
|---|---|---|---|
| Separate remote clicker | Locks, unlocks, trunk, panic | $15-$50 | Manual procedure on selected older vehicles |
| Integrated key remote | Ignition key plus remote buttons | $50-$150 | Manual pairing plus possible transponder programming |
| Transponder key | Immobilizer authorization | $40-$120 | Locksmith or dealer diagnostic equipment |
| Smart proximity fob | Passive entry and push-button start | $150-$400+ | Vehicle-specific procedure or diagnostic programming |
Before You Start
Prepare the correct battery, all available fobs, the vehicle owner’s manual, and a stable 12-volt vehicle battery before entering programming mode. A manual attempt usually takes 5-10 minutes, has low physical difficulty, and costs $2-$8 for a coin cell if the battery is the only part needed.
Check the replacement battery number printed in the old cell or specified in the manual. CR2032 and CR2025 cells are both 3-volt lithium batteries, but their thickness differs, so they are not automatically interchangeable in every housing.
Preparation checklist
Correct coin cell, usually one CR2032 or CR2025
All working and replacement fobs, including a spare
Owner’s manual or manufacturer procedure for the exact vehicle
Physical key available for door access
Vehicle battery above normal starting voltage
Doors, hood, trunk, and liftgate fully closed unless the manual says otherwise
Five uninterrupted minutes without pressing random buttons
Inspect the fob before programming. The positive side of a coin cell commonly faces the marked cover or the metal spring arrangement, but the housing design controls. Remove any transparent protective film and confirm that the battery sits beneath the retaining tabs rather than above them.
How to Reprogram Key Fob After Replacing Battery
The safest generic process is to verify the battery, close the vehicle, enter the vehicle’s programming mode, press the remote button, and test every programmed fob. The numbered sequence below describes the common ignition-cycle pattern, but manufacturers use different timing, key positions, and confirmation signals.
Step 1: Verify the battery and fob contacts
Open the fob carefully and install the specified 3-volt coin cell with the correct polarity. Press the battery firmly under the retaining clip, then inspect the metal contacts for oxidation, bending, or contamination from fingerprints.
Use a multimeter only if you can safely contact the battery without shorting its two faces. A fresh lithium coin cell typically measures near its rated 3 volts without load, but open-circuit voltage alone cannot prove that a damaged cell performs correctly under load.
You will know it worked when: the battery sits flat, the contacts touch firmly, and the fob’s indicator light responds to a button press.
Common mistake: installing a battery with the printed positive face in the wrong direction because the fob’s case is assembled upside down.
Step 2: Gather every fob and close the vehicle
Place every remote that should operate the vehicle inside the cabin. Close all doors, the trunk, and the hood, then sit in the driver’s seat with the physical key available.
Some vehicles erase previously stored remotes when programming mode opens. A remote not presented during that session may stop working even though its battery and electronics remain functional.
You will know it worked when: no interior or exterior lamp indicates an open entry point and every desired fob is within reach.
Common mistake: leaving a rear hatch ajar, which prevents the body-control module from accepting the programming sequence on some vehicles.
Step 3: Turn the ignition to the required position
Insert a recognized key and turn the ignition from LOCK or OFF to ON or RUN without starting the engine. On vehicles with a push button, follow the manual’s equivalent position, which may require pressing the button without touching the brake pedal.
The ON or RUN position powers the vehicle electronics while leaving the engine off. Do not assume that accessory mode is equivalent, because many receivers monitor a different ignition-state signal.
You will know it worked when: the instrument cluster illuminates without engine cranking.
Common mistake: starting the engine, which exits the programming sequence and may force a complete restart.
Step 4: Enter the vehicle’s programming mode
Use the exact ignition-cycle or door-lock sequence specified for the vehicle. Older systems may require turning the key from OFF to RUN four to eight times within roughly 10 seconds. Other systems use four complete ON-to-OFF cycles, a door-lock switch, or a scan tool instead.
A lock click, interior chime, flashing security indicator, or dashboard message usually confirms programming mode. The number of cycles is not universal, so a generic “turn the key eight times” instruction can be wrong for a particular Ford, Toyota, Honda, Chevrolet, Nissan, Kia, or European vehicle.
You will know it worked when: the door locks cycle or the vehicle gives the confirmation signal described in the manual.
Common mistake: pausing too long between cycles. Many procedures reset after several seconds of inactivity.
Step 5: Press the fob button once
Within the programming window, press the LOCK button once, or press the button named in the factory instructions. A short press is safer than holding multiple buttons because some vehicles assign separate functions to long presses.
The receiver stores the remote’s identity and current code relationship when the command is accepted. Do not press buttons on a second remote until the first remote receives its confirmation.
You will know it worked when: the locks cycle, the horn chirps, or the dashboard confirms acceptance.
Common mistake: pressing the panic, trunk, or remote-start button first when the procedure requires LOCK.
Step 6: Add every other available remote
Press the required button on each additional fob during the same programming window. Many systems allow only a few seconds between remotes, while others require a separate confirmation for every transmitter.
Programming all remotes together prevents accidental memory replacement. If one previously working remote is absent, test it after the session because the vehicle may now recognize only the remotes entered during that cycle.
You will know it worked when: each fob produces the vehicle’s confirmation response and all buttons work during the final test.
Common mistake: assuming that a remote automatically remains stored because it was programmed previously.
Step 7: Exit programming mode and test the result
Turn the ignition off, remove the key, and wait several seconds before testing LOCK, UNLOCK, trunk release, panic, and remote start if equipped. Stand at a normal operating distance rather than touching the vehicle, because a weak signal can appear functional at close range.
Test the physical key and engine start separately. A successful lock response does not prove that the transponder is authorized to start the engine.
You will know it worked when: every intended remote operates its assigned functions from a normal distance and the vehicle starts with the recognized key.
Common mistake: testing only the lock button, then discovering that the trunk or remote-start function was not accepted.
How Do You Pair a Smart Proximity Fob?
A smart proximity fob usually pairs through a manufacturer-specific backup reader, diagnostic tool, or security procedure rather than a universal button sequence. Place the fob in the documented backup location, such as a center-console pocket, glovebox slot, or steering-column reader, then follow the vehicle’s starting instructions.
The backup location has two possible roles. It may allow the immobilizer antenna to read a dead fob so the vehicle can start. It may not place the fob into programming mode or add a new fob to the vehicle’s memory.
For many push-button vehicles, the emergency-start process involves holding the fob against the START/STOP button or placing it in a marked pocket while pressing the brake and start control. The location varies by model year, so the owner’s manual is more reliable than a generic video.
What if the smart-fob battery is completely dead?
A dead smart-fob battery may still permit starting because the vehicle’s passive transponder reader can energize the fob at close range. Use the mechanical key to unlock the door, then place the fob in the vehicle’s designated backup position.
| Vehicle situation | Likely emergency location | Result |
|---|---|---|
| Push-button vehicle with console pocket | Center console or cupholder slot | Vehicle reads the fob at close range |
| Push-button vehicle without visible pocket | Against START/STOP button | Backup antenna reads the transponder |
| Ford-style intelligent access system | Marked center-console or backup slot | Vehicle permits recognized-key starting |
| Key with ignition switch | Insert mechanical key | Ignition antenna reads the transponder |
Which Programming Option Should You Choose?
Manual programming is the lowest-cost choice when the vehicle explicitly supports it and the existing fob is already compatible. A locksmith is usually the practical choice for a replacement or transponder key, while a dealer becomes more appropriate when the vehicle needs online security authorization or has no available working key.
| Option | Typical cost | Typical time | Equipment and limitation |
|---|---|---|---|
| Owner manual procedure | $0-$8 | 2-10 minutes | No scan tool, limited vehicle coverage |
| Automotive locksmith | $50-$150 | 20-60 minutes | Mobile diagnostic programmer, compatibility check |
| Dealer service | $100-$300+ | 30-120 minutes | OEM access, VIN and ownership verification |
| Mail-in or online fob service | $25-$100 | 2-7 days | Requires exact part compatibility, no same-day help |
Prices are typical US ranges, not guaranteed quotes. Smart keys for luxury vehicles, vehicles with all keys lost, and systems requiring security-code access can exceed $400 because the replacement hardware and programming are separate charges.
A locksmith can often program a compatible remote at the vehicle’s location, but a low price does not overcome an incorrect FCC ID, frequency, circuit board, or immobilizer generation. Dealers have stronger access to OEM systems, but they may charge more and require an appointment.
When manual programming is not available
Manual pairing is often unavailable on newer vehicles, proximity systems, vehicles with all keys lost, and vehicles whose security module requires authenticated diagnostic access. An OBD programming tool may be necessary, but a generic consumer OBD2 code reader cannot normally add keys.
Do not connect an unknown programming device to a vehicle with a weak battery. Voltage loss during security-module writing can interrupt a programming session and create a more expensive recovery problem.
Used and Aftermarket Fob Compatibility
A used or aftermarket fob must match the vehicle’s frequency, FCC ID or regional identifier, part number, button layout, transponder type, and programming system. Physical similarity alone does not establish compatibility.
| Compatibility check | Example value | Why it matters |
|---|---|---|
| Frequency | 315 MHz or 433.92 MHz | Regional radio systems differ |
| Identifier | FCC ID printed inside case | Confirms transmitter family |
| Part number | OEM code such as 95440-series | Links hardware to vehicle applications |
| Button layout | 3-button, 4-button, or 5-button | Affects command mapping |
| Key type | Blade, flip key, or proximity | Determines mechanical and immobilizer needs |
Some vehicles allow a used remote to be relearned. Others lock the transmitter to its original vehicle or require a reset that only specialized equipment can perform. Ask the seller whether the fob is new, refurbished, virgin, or previously locked before buying.
A replacement shell does not contain electronics. Moving the original circuit board and transponder into a compatible shell can restore appearance without programming, provided the board and battery contacts are undamaged.
Common Failure Modes and Fixes
The fob does nothing after the battery change
Check polarity, battery number, protective film, metal contacts, and case alignment before attempting programming. A damaged contact can interrupt power even when the battery is new.
Try the spare fob. If the spare also fails, inspect the vehicle’s keyless-entry fuse and vehicle battery rather than assuming both remotes lost programming simultaneously.
The locks cycle, but the remote still fails
A lock cycle during the procedure may indicate entry into programming mode rather than successful fob acceptance. Repeat the button press within the stated time, then complete the exit sequence before testing.
Move away from strong radio interference such as wireless transmitters, high-power chargers, or another vehicle being programmed nearby. Interference is less common than an incorrect procedure, but it can obscure the confirmation signal.
The remote works, but the engine will not start
The buttons are programmed, but the immobilizer transponder is not authorized, damaged, or absent. A locksmith or dealer must usually add the key to the vehicle’s immobilizer system with approved diagnostic equipment.
Do not keep repeating the lock-button procedure. Remote pairing will not teach the engine control system to recognize a separate transponder.
The vehicle will not enter programming mode
Confirm that all doors, the trunk, hood, and liftgate meet the manual’s required state. Check the vehicle battery, keyless-entry fuse, ignition position, and timing, then retry with the physical key if the system requires a recognized key.
A missing prerequisite key can also block the sequence. Some manufacturers permit programming only when one already-authorized key is present.
One fob works and another does not
Compare the failed fob’s FCC ID, part number, frequency, and circuit board with the working unit. If the hardware matches, repeat the procedure while pressing the required button once, not repeatedly.
A worn switch or cracked solder joint can imitate a programming failure. A locksmith can test the transmitter’s radio output and determine whether the vehicle or fob is at fault.
Practitioner Rules That Prevent Repeat Failures
First, photograph the old battery before removing it. The image records polarity and helps prevent a reversed installation when the case has no clear marking.
Second, avoid pressing the fob repeatedly while standing far from the vehicle. On some rolling-code systems, those presses advance the transmitter’s counter without giving the vehicle an opportunity to accept each code.
Third, replace the coin cell before the voltage becomes marginal. A remote may still light its indicator while transmitting too weakly for reliable vehicle reception, especially in cold weather or through a damaged case.
FAQ
Can I reprogram a key fob without the original key?
Sometimes, but not universally. Older vehicles with onboard remote programming may accept a replacement fob without an original key. Vehicles that require an authorized key, security PIN, or diagnostic authorization need a locksmith or dealer, particularly when every key has been lost.
How long does key-fob programming take?
Manual remote synchronization typically takes 2-10 minutes after the correct battery is installed. Locksmith programming commonly takes 20-60 minutes, while dealer appointments may take 30-120 minutes depending on security authorization, key cutting, and vehicle access.
Does disconnecting the car battery reset the key fob?
Disconnecting the vehicle battery normally does not erase the fob’s stored identity, and it is not a dependable programming method. Vehicle settings may reset, but the remote and immobilizer usually retain their data. Use the manufacturer’s pairing procedure instead of disconnecting power.
Can a key fob be programmed with a phone?
A phone cannot normally program a conventional vehicle key fob because the vehicle requires a compatible transmitter, immobilizer credential, and authenticated programming process. Some manufacturer apps can control locks through cellular services, but app enrollment is separate from pairing a physical key.
Why does my key fob work only close to the car?
A short operating range usually indicates a weak or incorrect battery, dirty contacts, a damaged antenna, a cracked circuit board, or radio interference. Replace the specified cell first, then compare the range with a spare fob. If both have short range, inspect the vehicle receiver or antenna.
Should I replace the fob or only the battery?
Replace only the battery when the housing, buttons, circuit board, and contacts are intact. Replace or repair the fob when the transmitter has water damage, broken solder joints, worn switches, or an incompatible radio identity. A new shell alone will not repair damaged electronics.
The Bottom Line
The correct way to reprogram key fob after replacing battery is to verify the battery first, consult the exact vehicle procedure, enter programming mode, pair every available remote, and test both remote functions and engine starting. Battery replacement alone usually does not erase programming. If the locks work but the engine does not start, the immobilizer requires separate service, normally from an automotive locksmith or dealer.