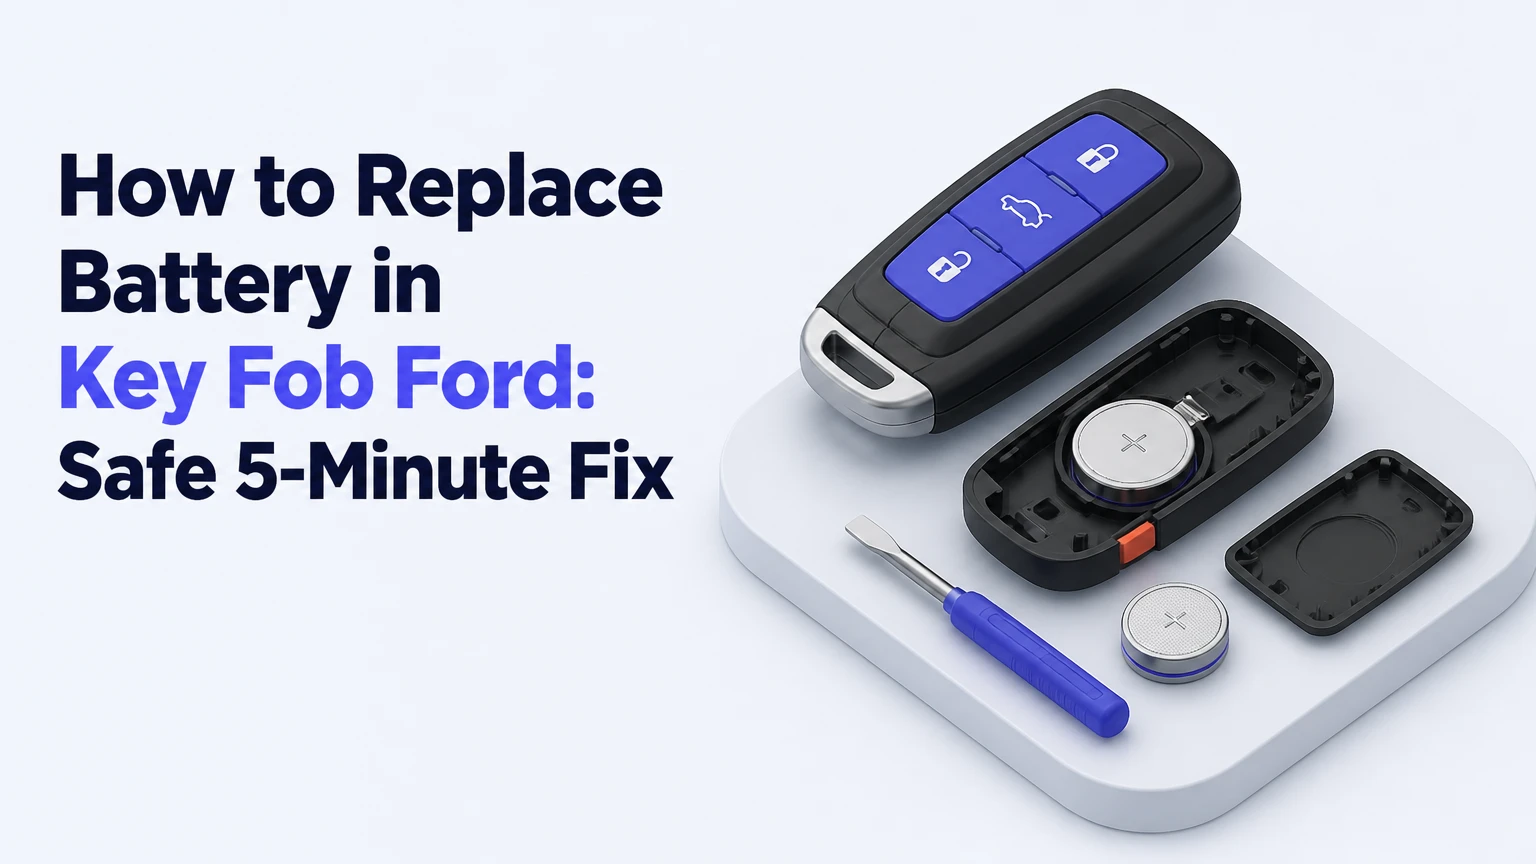
To replace a battery in a Ford key fob, identify the fob design, open the case at its intended seam, install the exact replacement cell with the same polarity, and snap the housing closed. Most Ford remotes use a CR2032 3-volt lithium coin cell, although certain older or thin remotes use a CR2025. The job typically takes 2-5 minutes.
Key Facts at a Glance
- A Ford key fob battery replacement normally does not erase the remote’s programming.
- CR2032 is the most common Ford coin-cell battery, but the original cell and vehicle documentation take priority.
- CR2032 and CR2025 both measure 3 volts, but a CR2032 is thicker and may not fit every Ford remote correctly.
- Intelligent Access remotes hide a mechanical key blade inside the housing.
- A dead remote battery may prevent convenient unlocking, but many Ford vehicles still provide a backup starting method.
- A damaged contact clip, depleted vehicle battery, or failed circuit board can mimic a weak key fob battery.
Before You Start
Ford key fob battery replacement requires one new coin cell, a small non-marring pry tool, and a clean work surface. A narrow flathead screwdriver can work, but a plastic trim tool or the tip of the emergency key is less likely to scratch the shell or slip into the circuit board.
| Requirement | Typical specification | Why it matters |
|---|---|---|
| Replacement cell | CR2032 or CR2025, 3 volts | The diameter is similar, but thickness differs |
| Working time | 2-5 minutes | Includes opening, replacement, and testing |
| DIY battery cost | $1-$5 USD, approximately 100-500 BDT | Price varies by brand and retailer |
| Pry tool | 1 small flathead or plastic tool | Fits the molded seam or release slot |
| Work surface | Dry, illuminated, 30 cm or wider | Prevents lost springs and reversed installation |
| Verification material | Old battery, owner’s manual, or Ford support page | Confirms cell number and fob-specific procedure |
Wash and dry your hands before handling the new cell. Oils on the battery surface do not usually stop a remote from working, but clean handling reduces contamination at the contact points. Keep the old battery away from children and animals, and recycle coin cells through a battery collection program rather than placing them in household trash.
The most important preparation step is photographing the old battery before removing it. Ford fob polarity varies by housing generation, so a general rule such as “positive side up” is less reliable than copying the original orientation.
Which Battery Does a Ford Key Fob Use?
Most Ford key fobs use a CR2032 lithium coin cell, while some older or unusually thin remotes use a CR2025. Both cells are nominally 3 volts and have a 20 mm diameter, but the CR2032 is approximately 3.2 mm thick and the CR2025 approximately 2.5 mm thick.
| Battery | Nominal voltage | Diameter | Thickness | Typical Ford application |
|---|---|---|---|---|
| CR2032 | 3 volts | 20 mm | 3.2 mm | Many modern Intelligent Access and flip-key fobs |
| CR2025 | 3 volts | 20 mm | 2.5 mm | Some older, thinner, or model-specific remotes |
| CR2016 | 3 volts | 20 mm | 1.6 mm | Not a routine substitute for CR2032 or CR2025 |
| CR2450 | 3 volts | 24.5 mm | 5.0 mm | Too large for standard Ford key fob slots |
Do not select a replacement only because it has the same voltage. A thinner CR2025 can sit loosely in a CR2032 holder, causing intermittent contact when the fob moves. A thicker CR2032 can prevent the cover from closing or put excessive pressure on the circuit board in a fob designed for a CR2025.
Ford’s official support material and individual owner’s manuals are the best references when the cell marking is unreadable. The battery number printed on the removed cell remains the fastest practical check, provided the previous cell was installed correctly and the remote has not been modified.
How Do You Identify the Ford Fob Type?
A Ford key fob with a hidden metal blade and no visible ignition key is usually an Intelligent Access remote. A remote with a spring-loaded blade is a flip-key fob, while a separate rounded remote often has a seam around its oval or teardrop shell.
| Fob design | Visual clues | Common vehicle setup | Opening method |
|---|---|---|---|
| Intelligent Access | Angular body, hidden blade, push-button start | Escape, Explorer, Edge, Fusion, F-150 and other equipped models | Remove blade, use internal release slot |
| Flip key | Metal blade folds into remote body | Turn-key ignition models | Open notch in the recessed blade area |
| Separate oval remote | Rounded shell, no integrated ignition blade | Older Ford vehicles and separate remotes | Pry at perimeter seam |
| Older multi-button remote | Large rubber buttons, visible shell seam | Legacy cars, trucks, and vans | Use molded slot or case seam |
Shape is a useful starting point, not proof of the correct procedure. The same Ford model can use different remotes in different years, trim levels, markets, or replacement-key systems. Confirm the battery marking and inspect the case for a molded arrow, notch, release tab, or small opening before applying force.
Step-by-Step Battery Replacement
The following steps apply to the three common Ford remote designs. Stop if the shell begins to whiten, bend, or crack, because that indicates force is being applied away from the designed release point.
Step 1: Prepare the Replacement and Record Polarity
Place the new battery beside the fob and compare the printed code, diameter, and thickness with the old cell. Take a clear photograph of the old battery in place, including the visible plus sign and the metal contact arrangement.
Do not remove the old cell until the replacement is ready. Coin cells are easy to drop, and a missing battery can make the original orientation difficult to reconstruct.
Success checkpoint: You can state the replacement code and identify which face of the old cell was visible.
Common mistake: Assuming every Ford CR2032 installs with the positive side facing upward. Follow the original position instead.
Step 2: Remove the Hidden Key or Open the Blade
For an Intelligent Access remote, slide or press the release switch on the rear or lower edge, then pull the emergency metal key blade from the housing. For a flip-key remote, press the blade-release button and rotate the metal key fully outward.
A separate oval remote usually has no blade to remove. Inspect the outer edge for a small molded notch or indentation.
Success checkpoint: The blade is fully removed or extended, and the case seam is visible without twisting the buttons.
Common mistake: Prying against the rubber button pad. The pad can deform, and a displaced membrane may make several buttons feel permanently pressed.
Step 3: Open the Fob Housing
Insert the mechanical key tip, a plastic pry tool, or a small flathead screwdriver into the designated slot. Twist gently rather than driving the tool deep into the shell. Work around the seam only when the first retaining clip has released.
On many Intelligent Access fobs, the battery compartment becomes accessible through the slot left by the removed key blade. On flip keys, the notch often sits inside the recessed area where the blade folds. Older remotes commonly split along a perimeter seam.
Success checkpoint: The two shell halves separate by a few millimeters, with no broken clips or torn rubber seal.
Common mistake: Using a kitchen knife. A sharp blade can slip into a hand, cut the button membrane, or gouge the printed circuit board.
Step 4: Remove the Old Coin Cell
Use a fingernail, plastic tool, or the screwdriver tip at the battery’s molded lift point. Push the cell sideways out of its retaining clip instead of levering directly against the circuit board.
Avoid touching components on the green printed circuit board. Do not bend the metal spring contacts farther than necessary, because a flattened contact can cause intermittent operation after the new cell is installed.
Success checkpoint: The old battery is removed and the contact clips remain aligned with the battery slot.
Common mistake: Scraping across the circuit board. Even a small damaged trace can disable the remote, turning a low-cost battery job into an electronic repair.
Step 5: Install the New Battery
Slide the replacement cell beneath the fixed retaining edge, then press the opposite edge down until the contact clip holds it. Match the polarity shown in your photograph or manual. The positive face is marked with a plus sign, while the negative face is usually the unmarked metal side.
The correct orientation differs between Ford fob generations. Some holders place the positive face toward the cover, while others place it toward the circuit board, so visual confirmation is safer than relying on a universal instruction.
Success checkpoint: The cell lies flat, does not rattle, and cannot lift out when the fob is turned over.
Common mistake: Forcing a CR2032 into a CR2025 holder. If the cover will not close with normal hand pressure, remove the battery and verify the code.
Step 6: Reassemble the Shell
Align the shell halves, buttons, rubber membrane, and any internal spacer before pressing the housing together. Start at the side with the alignment tabs, then press around the perimeter until every clip engages.
For an Intelligent Access remote, slide the mechanical key blade back into its channel until the release mechanism holds it. Fold a flip-key blade only after the case is completely closed.
Success checkpoint: The seam is even around the full perimeter, all buttons move freely, and the blade locks in place.
Common mistake: Closing the shell while the membrane or battery is shifted. A pinched membrane can produce stuck buttons, and a displaced cell can cause weak range.
Step 7: Test Every Function
Stand near the vehicle and press lock, unlock, panic, and trunk-release buttons if the fob has them. Test the remote from several metres away, then confirm passive entry or push-button starting if the vehicle supports those functions.
A battery replacement normally preserves the fob’s stored identity and does not require reprogramming. If the remote remains completely dead, test the new cell with a battery tester or install a second fresh cell before assuming that programming has been lost.
Success checkpoint: Each button produces the expected vehicle response, and the range is similar to the previous normal range.
Common mistake: Testing only the lock button. A damaged rubber membrane or worn switch may affect one function while the transmitter still operates.
Type-Specific Procedures
Intelligent Access Key Fob
Ford Intelligent Access remotes generally use a hidden-key release followed by an internal case-opening slot. After removing the blade, inspect the exposed channel for a molded tab or recess, then use the blade tip or a small tool to separate the housing.
The battery may sit with its positive face toward the circuit board or toward the rear cover, depending on the fob generation. Record the old position before lifting the cell. After installation, replace the cover evenly and return the emergency blade.
Ford vehicles with push-button start often include a passive backup reader. If the new battery does not restore starting, consult the owner’s manual for the exact backup location, which may be a marked pocket in the centre console, a cupholder, or a specified position near the start button.
Flip-Key Remote
A flip-key remote contains a spring-loaded metal blade and may have a separate battery cover. Extend the blade fully, locate the notch in the recessed blade cavity, and twist gently to release the rear cover.
Keep fingers away from the blade hinge while pressing the release button. The battery is commonly a CR2032, but the cell marking remains authoritative. Reassemble the cover before repeatedly operating the blade, since an open shell can allow the spring mechanism or internal spacer to shift.
Older Oval or Teardrop Remote
Older Ford remotes commonly split at a small slot along the rounded perimeter. Insert a coin or blunt tool and twist in short movements around the seam. The battery may be a CR2032 or CR2025, and the positive side can face downward against the contact clips.
Older shells are more likely to have brittle plastic after years of heat exposure. If the casing cracks, a replacement shell may transfer the circuit board and buttons, but the transponder arrangement and key blade must remain compatible with the vehicle.
Which Replacement Method Is Best?
DIY replacement is normally the lowest-cost option, while a dealership or automotive locksmith is useful when the shell, circuit board, blade, or vehicle programming also needs attention. Some parts retailers replace common coin cells at the counter, but service availability varies by location and fob design.
| Option | Typical cost | Typical time | Best use case |
|---|---|---|---|
| DIY replacement | $1-$5 USD | 2-5 minutes | Intact shell and clearly marked battery |
| Automotive parts store | $5-$15 USD including service | 5-15 minutes | User wants help opening a standard remote |
| Automotive locksmith | $10-$30 USD for battery service | 10-30 minutes | Fragile shell or difficult key design |
| Ford dealership | $20-$50 USD for routine service | 30-120 minutes including waiting | Warranty visit or additional diagnosis |
| New programmed fob | $100-$500+ USD | 30 minutes to several hours | Lost, damaged, or nonfunctional remote |
Prices are typical consumer ranges, not fixed Ford charges. A dealership visit becomes more reasonable when the vehicle has a separate no-start fault, the remote is physically damaged, or the owner needs a replacement key rather than a battery.
A battery swap is not a substitute for key cutting, transponder programming, immobilizer diagnosis, or replacement of a water-damaged circuit board. That distinction prevents an unnecessary battery purchase when the remote has already failed electronically.
What If the New Battery Does Not Work?
A Ford key fob that remains inoperative after battery replacement usually has one of five causes: reversed polarity, poor contact, a stale replacement cell, damage to the remote, or a depleted vehicle battery. Check the simple physical causes before attempting any programming procedure.
| Symptom after replacement | Most likely cause | Corrective action | Expected result |
|---|---|---|---|
| No buttons work | Reversed cell or dead battery | Recheck polarity and install a known-fresh cell | Remote responds immediately |
| Works only when squeezed | Loose cell or bent contact | Reseat cell and raise contact slightly | Stable button operation |
| Range is only 1-2 metres | Weak cell, interference, or antenna damage | Test another branded cell away from electronics | Normal range may return |
| One button fails | Worn switch or torn membrane | Inspect button pad and switch area | Other functions remain available |
| Vehicle does not unlock | Vehicle battery or receiver fault | Test interior lights and manual lock | Vehicle fault becomes identifiable |
| Car will not start | Passive reader or immobilizer issue | Use the documented backup-start position | Engine may start without remote power |
Do not pry contact clips upward with a sharp metal point while the battery is installed. Disconnecting the cell first and using a wooden toothpick or plastic pick reduces the chance of shorting the battery against adjacent components.
A new battery can also be defective or old stock. Replace it with a reputable lithium coin cell from a retailer with normal inventory turnover. Do not stack two coin cells to increase voltage, because that can damage the transmitter and create a short-circuit hazard.
Does Replacing the Battery Erase Ford Key Programming?
Replacing a Ford key fob battery normally does not erase the fob’s programming. The battery powers the transmitter and button functions, while the vehicle stores the remote’s identification and immobilizer relationships separately.
A remote may need programming when the fob itself is newly cut, the vehicle’s receiver has been replaced, or a model-specific synchronization procedure is required after an unrelated electrical fault. Battery replacement alone is not normally a programming event.
Some older Ford vehicles allow owner-accessible remote synchronization through a sequence of ignition-key turns and button presses, while many newer vehicles require the owner’s manual procedure or a diagnostic tool. Do not perform a model-specific sequence copied from another Ford unless the year, body style, and key system match.
The passive transponder used for engine authorization may be separate from the coin-cell-powered remote transmitter. That is why some Ford vehicles can start with a dead remote battery when the fob is placed in the manufacturer-specified backup location.
Can You Start a Ford With a Dead Key Fob Battery?
Many Ford vehicles can start with a dead key fob battery by using the hidden mechanical blade for door access and placing the fob at the vehicle’s backup passive-reader location. The exact location depends on the model and model year, so the owner’s manual takes priority.
The backup procedure commonly involves these actions:
- Remove the emergency metal key and unlock the driver’s door manually.
- Enter the vehicle and apply the brake if the vehicle uses push-button start.
- Place the key fob in the documented backup pocket, slot, centre-console compartment, or specified position near the start button.
- Press the start button while the fob remains in that position.
- Replace the coin cell before relying on the emergency method again.
A dead vehicle battery produces similar symptoms but will usually affect interior lighting, horn operation, locks, and other electrical systems. If a second programmed fob also fails, diagnose the vehicle battery and receiver before blaming the replacement cell.
How Can You Prevent Damage During Replacement?
The safest Ford key fob replacement uses the shallowest opening tool that fits the molded slot, keeps the circuit board supported, and avoids pressure on rubber buttons and contact springs. Gentle twisting at the intended seam is safer than forcing a screwdriver through the housing.
Use these practitioner rules:
- Work over a tray or light-coloured cloth so a spring, spacer, or button does not disappear.
- Take a polarity photograph before removal, even when the replacement looks obvious.
- Never use a knife, pry against a button, or push a tool farther than the slot depth requires.
- Keep the circuit board dry and free from fingerprints, adhesive, and metal filings.
- Test the shell closure before operating a flip-key blade repeatedly.
- Store the removed cell in a sealed bag until recycling, especially where children or pets are present.
One counterintuitive failure occurs when a remote works on the bench but fails inside the vehicle. The cause can be a weak vehicle battery or radio-frequency interference, not a poorly installed coin cell. Test near the vehicle, then test the second fob and the vehicle’s other electrical functions.
Common Mistakes and How to Fix Them
Installing the right voltage but wrong thickness
CR2025 and CR2032 batteries both provide 3 volts, but their 0.7 mm thickness difference can determine whether the contacts remain loaded. Use the exact printed cell number rather than choosing any 20 mm lithium battery.
Assuming polarity from internet photos
Ford fob housings differ by generation and supplier. A photo for a 2018 Escape may not match a 2011 Focus or a 2022 F-150. Copy the original orientation and verify the plus mark.
Bending a contact clip too far
A contact needs only enough spring pressure to touch the cell. Excessive bending can break the clip from its solder joint, leaving the remote permanently intermittent.
Closing a dirty or misaligned housing
Dust, a shifted membrane, or an incorrectly seated spacer can keep clips from engaging. Remove the cover, align the internal parts, and press around the perimeter rather than squeezing the centre.
Reprogramming before checking the battery
A new cell does not normally require programming. Confirm polarity, cell freshness, contacts, and the vehicle battery before attempting synchronization.
Cost, Time, and Decision Guide
The practical decision depends on the condition of the fob rather than the Ford badge alone. A clean, intact remote is a suitable five-minute DIY job, while a cracked shell or no-start condition justifies professional diagnosis.
| User situation | Recommended action | Typical outlay | Main limitation |
|---|---|---|---|
| Battery warning or reduced range | DIY cell replacement | $1-$5 USD | Requires careful polarity check |
| Remote works intermittently | Cell replacement plus contact inspection | $1-$15 USD | Contact or switch damage may remain |
| Broken shell or missing blade | Locksmith or Ford dealer | $30-$500+ USD | Battery replacement alone cannot restore structure |
| Remote will not program or start vehicle | Vehicle and key-system diagnosis | $50-$150+ USD diagnostic range | Fault may involve receiver or immobilizer |
| No electrical power in vehicle | Vehicle battery testing first | $0-$250+ USD | Key fob may not be the cause |
Ford’s official support pages and owner’s manuals should be used for model-specific release points, battery specifications, and backup-start locations. Independent repair guides are useful for visual orientation, but a generic instruction should never override the manual for a particular year and trim.
FAQ
How often should a Ford key fob battery be replaced?
A Ford key fob battery commonly lasts 2-4 years, depending on button use, temperature, signal activity, and battery quality. Replace it when range decreases, the vehicle displays a low-key-battery warning, or buttons require repeated presses. A spare fob stored unused can still age because lithium cells slowly lose charge.
Can I use a rechargeable battery in a Ford key fob?
Do not substitute a rechargeable coin cell unless the fob manufacturer specifically approves that chemistry and voltage. Standard Ford remotes are designed around a disposable 3-volt lithium coin cell such as CR2032 or CR2025. Rechargeable alternatives may have different voltage, charging requirements, dimensions, and discharge behaviour.
Why does my Ford say No Key Detected after a battery change?
No Key Detected can result from reversed polarity, poor contact, an incorrectly seated cell, radio interference, a weak vehicle battery, or a fault in the passive key system. Recheck the cell first, then place the fob in the model-specific backup location and test the second programmed key.
Does the hidden metal key start the Ford?
The hidden metal key normally unlocks the door mechanically, but it does not by itself authorize the engine on vehicles with an electronic immobilizer. The fob’s passive transponder provides authorization. Follow the owner’s manual backup-start procedure if the remote battery is depleted.
Can a Ford key fob battery be changed without tools?
Some Ford remotes can be opened with the mechanical key blade or a fingernail, but a small plastic pry tool makes damage less likely. Do not use a kitchen knife. If the case has no obvious slot, confirm the fob design before forcing the seam.
What should I do with the old coin cell?
Cover the old battery’s exposed faces with tape, keep it away from children and pets, and take it to a battery recycling point or household hazardous-waste collection site. Coin cells can create a serious ingestion hazard and should not be left loose in a drawer or thrown into general waste.
The Bottom Line
To replace a battery in a Ford key fob, confirm CR2032 or CR2025 from the old cell or Ford documentation, open the correct seam, copy the original polarity, install the new 3-volt lithium cell, and test every button; Audi Comfort Key battery replacement also distinguishes slide-out trays from snap-off rear covers. The process usually takes 2-5 minutes and does not erase programming. If the remote still fails, inspect contacts and vehicle power before arranging key programming or replacement.