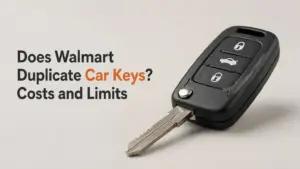
To program a Toyota key fob, first identify whether the vehicle uses a remote-only fob, transponder key, or smart key. Many older keyed-ignition Toyotas support an owner-performed door-and-ignition sequence that registers lock buttons in about 5-10 minutes. Push-button smart keys and immobilizer chips usually require Toyota Techstream or an automotive locksmith’s approved programming equipment.
Key facts at a glance
Toyota remote-button registration and engine immobilizer programming are separate procedures.
A manual door sequence works only on compatible Toyota models, years, and remote systems.
The FCC ID, Toyota part number, button layout, and vehicle market must match the replacement remote.
A new fob battery powers transmission but does not normally erase an already registered remote.
Push-button smart keys commonly require security access through Techstream or professional equipment.
A typical replacement costs $50-$150 for a remote-only unit and $200-$500 for many smart-key services.
What Toyota Key-Fob Programming Actually Does
Toyota key-fob programming teaches the vehicle’s body electronics to accept a particular remote transmitter. The vehicle stores an identifier or synchronized code sequence, then responds when the fob sends lock, unlock, panic, or hatch commands. Programming the buttons does not necessarily authorize the mechanical key or immobilizer transponder to start the engine.
A Toyota remote uses a battery, circuit board, radio transmitter, antenna, and button switches. Depending on the vehicle, the system may operate around 315 MHz in many North American applications or use another market-specific frequency. Frequency alone is not enough for compatibility, because the FCC ID, internal board, protocol, housing, and vehicle receiver must also correspond.
Rolling-code systems change the accepted transmission sequence after each valid press. That design prevents a previously captured radio transmission from remaining permanently useful. Smart-key systems add low-frequency vehicle antennas and an immobilizer exchange, allowing the car to detect an authorized key near the doors or push-button ignition.
Remote registration versus immobilizer programming
Remote registration controls convenience functions such as door locks and panic alarms. Immobilizer programming authorizes the transponder chip to release the engine-start circuit, and Toyota normally protects that process more heavily than ordinary remote registration.
A fob can therefore lock and unlock the vehicle while the blade or push-start function still fails. Conversely, a correctly cut key may turn the ignition cylinder while its remote buttons remain unregistered. Treating these as one operation causes many unnecessary dealer visits and incorrect online purchases.
Can You Program a Toyota Fob Yourself?
You can program many Toyota remote-only fobs yourself when the vehicle has a keyed ignition and supports the manual registration sequence. You generally cannot complete smart-key or immobilizer registration with an ordinary generic OBD2 code reader, because emissions scanners do not provide Toyota’s security functions.
The manual procedure is commonly associated with selected Toyota vehicles from approximately the early 2000s through the mid-2010s, but year ranges are not universal. Corolla, Camry, RAV4, Tacoma, Tundra, 4Runner, Sienna, Matrix, and Yaris systems can differ by trim, market, receiver, and factory equipment.
Before attempting the sequence, confirm the procedure for the exact year and model in the owner’s manual, a Toyota service manual, or a reputable key supplier’s vehicle-specific database. Do not assume that a similar-looking remote or a neighboring model uses the same sequence.
Before you start
| Requirement | Typical value | Why it matters |
|---|---|---|
| Vehicle state | Parked, ignition off | Prevents accidental movement and system interruption |
| Cabin preparation | All doors closed, windows up | Door-status switches affect entry into programming mode |
| Existing key | 1 working master key, when required | Some procedures need an authorized ignition key |
| Replacement remote | Correct FCC ID and part number | Appearance and button count do not prove compatibility |
| Time available | 10-15 minutes | Allows one complete attempt and a second attempt |
| Battery | Fresh CR2032 or CR1620, model-dependent | Weak voltage can mimic a registration failure |
Remove additional key rings and aftermarket alarm remotes from the ignition area. Keep every replacement remote inside the vehicle during registration, because some Toyota procedures erase or replace previously stored remote entries rather than simply adding one.
How to Program a Toyota Key Fob at Home
The Toyota door-and-ignition sequence below applies only to compatible keyed-ignition remote systems. The procedure takes roughly 5-10 minutes, but the critical factor is completing each action in the specified order without adding extra ignition cycles or leaving another door open.
Step 1: Prepare the vehicle
Sit in the driver’s seat, unlock the vehicle, remove the ignition key, and close every door. Leave the driver’s door closed initially, with all windows raised and the interior free of objects that could obstruct the door latch.
Success checkpoint: The dome light and door-ajar indicator show a closed cabin.
Common mistake: Beginning with a passenger door open. A door-status signal can prevent the body ECU from entering registration mode.
Step 2: Insert and remove the key twice
Insert the working ignition key fully and remove it without turning it. Repeat once, producing the sequence: insert, remove, insert, remove.
Success checkpoint: The key has entered the cylinder twice and has not been turned to ACC or ON.
Common mistake: Leaving the key in the cylinder after the second insertion. That changes the sequence and usually requires a restart.
Step 3: Cycle the driver’s door twice
Open and close the driver’s door two times, then leave the driver’s door open. The sequence is open, close, open, close, open.
Success checkpoint: The driver’s door is open after the two complete open-and-close cycles.
Common mistake: Counting a partly latched door as closed. The latch must engage fully.
Step 4: Repeat the key removal
Insert the key once and remove it once without turning it. Do not repeat this portion.
Success checkpoint: The key has been inserted and removed exactly one time during this stage.
Common mistake: Turning the ignition because the sequence feels incomplete. Extra cycles can cancel the attempt.
Step 5: Cycle the driver’s door twice again
Open and close the driver’s door two more times, then leave it open. The vehicle has now received two key-removal stages and two sets of door cycles.
Success checkpoint: The driver’s door remains open and every other door remains closed.
Common mistake: Opening a passenger door to check the locks. Wait until the vehicle confirms programming mode.
Step 6: Enter the ignition confirmation sequence
Insert the key, close the driver’s door, and turn the ignition from OFF to ON, without starting the engine. Turn it back to OFF exactly once, then remove the key.
Success checkpoint: The ignition has completed one OFF-to-ON-to-OFF cycle only.
Common mistake: Cranking the engine or using ACC instead of ON. Either action may terminate the sequence.
Step 7: Confirm programming mode
Watch the power door locks. On a compatible system, the locks typically cycle once, moving from lock to unlock automatically. That cycle confirms that the vehicle is ready to receive the remote signal.
Success checkpoint: The locks cycle without pressing a fob button.
Common mistake: Continuing when no lock cycle occurs. No response means the vehicle did not enter the expected mode, so repeat the entire procedure after returning the vehicle to its starting state.
Step 8: Register the replacement remote
Within the vehicle’s registration window, press and hold LOCK and UNLOCK together for approximately 1-2 seconds. Release both buttons, then immediately press and hold LOCK for about 1 second.
Success checkpoint: The power locks cycle once after the button sequence.
Common mistake: Pressing LOCK before releasing both buttons, or holding both buttons for too long. Button timing varies slightly by Toyota system.
Step 9: Exit and test
Open the driver’s door to end the registration loop. Close the door, stand outside, and test LOCK, UNLOCK, panic, trunk, or hatch functions from several feet away.
Success checkpoint: Each installed button performs the expected vehicle function, and the remote works consistently after multiple presses.
Common mistake: Testing only one button. A partially compatible remote may operate LOCK while failing UNLOCK or panic.
What do one lock cycle and two lock cycles mean?
On many Toyota remote-registration procedures, one automatic lock cycle indicates successful registration and two cycles indicate rejection. Two cycles commonly result from an incorrect remote, wrong button timing, an exhausted memory position, or a procedure mismatch, although the exact signal varies by model.
Treat the lock response as a diagnostic clue, not a universal Toyota code. Check the exact service information for the vehicle before concluding that the receiver or fob is defective.
Which Toyota Key Type Do You Have?
Toyota key type determines whether DIY button registration is realistic. A remote-only fob may be programmable at home, while an integrated transponder key combines remote registration with a separate engine-start authorization process, and a proximity smart key typically needs security-capable equipment.
| Toyota key type | Visible feature | Main function | Typical programming route |
|---|---|---|---|
| Remote-only fob | Separate metal ignition key | Lock, unlock, panic | Manual sequence on compatible vehicles |
| Integrated transponder key | Blade and buttons in one head | Remote plus engine authorization | Remote sequence plus immobilizer procedure |
| Smart key | Push-button start, proximity detection | Passive entry and push-start | Techstream or professional programmer |
| Valet or mechanical key | Plain metal blade | Door or emergency access | Cutting only, no remote registration |
How do you match a replacement Toyota remote?
Match the original remote’s FCC ID, Toyota part number, board markings, button layout, frequency, and vehicle application. The FCC ID is often printed on the rear shell or inside the housing, while Toyota part numbers may appear in formats such as 89070-xxxxx or on the original packaging.
A replacement shell with the correct shape can still contain an incompatible circuit board. Used OEM remotes may also remain locked to another vehicle, and some aftermarket units advertise broad compatibility without supporting every trim. Verify return terms before buying.
Typical Toyota key-fob costs
| Replacement situation | Parts cost | Programming cost | Typical total time |
|---|---|---|---|
| New remote-only aftermarket fob | $20-$60 | $0 DIY | 10-20 minutes |
| Used OEM remote-only fob | $25-$80 | $0-$40 | 10-30 minutes |
| Integrated key with cut blade | $60-$150 | $40-$120 | 30-60 minutes |
| Smart-key replacement | $100-$350 | $80-$250 | 30-90 minutes |
| All-keys-lost locksmith service | $150-$450 | Included or itemized | 1-3 hours |
| Dealership smart-key service | $250-$600 | Included or itemized | 1-3 hours |
These are typical U.S. consumer ranges, not fixed Toyota prices. Location, vehicle security generation, key availability, cutting requirements, and whether an existing master key remains available can change the total substantially.
When Do You Need a Locksmith or Dealer?
A locksmith or Toyota dealer is appropriate when the vehicle has push-button start, all keys are lost, the immobilizer chip must be added, or the manual remote procedure fails after compatibility has been verified. A generic OBD2 reader is not an adequate substitute for a security-capable key programmer.
Toyota’s Techstream diagnostic environment can perform vehicle-specific immobilizer and smart-key functions when paired with the required authorization and interface. Automotive locksmiths may use professional tools from manufacturers such as Autel, Advanced Diagnostics, or other approved equipment, but tool coverage differs by model and security generation.
| Programming route | Best fit | Typical equipment | Typical price | Main limitation |
|---|---|---|---|---|
| DIY manual registration | Older keyed-ignition remote | Working key and correct fob | $0-$60 | Model-specific sequence |
| Mobile locksmith | Integrated or smart key | Key programmer and cutting machine | $100-$450 | Coverage varies by technician |
| Toyota dealer | Newer smart key or lost keys | Techstream and Toyota security access | $250-$600 | Highest typical cost |
| Generic OBD2 scan tool | Diagnostic codes only | Emissions scanner | $20-$150 | Usually cannot add keys |
| Online rental kit | Selected supported models | Dedicated cable and software | $60-$180 | Strict vehicle and tool compatibility |
What if every Toyota key is lost?
Do not rely on the manual door sequence when every authorized key is missing. Many procedures require an existing master key, and immobilizer reset or registration can require proof of ownership, vehicle identification, and security credentials.
A mobile automotive locksmith can often verify ownership, decode or cut the blade, erase missing keys where supported, and add replacement keys at the vehicle. A dealer may require the vehicle to be transported and may need registration, title, government identification, and the VIN.
Common Mistakes and How to Fix Them
Most failed Toyota fob registrations result from an incompatible remote, an incorrect vehicle procedure, a weak battery, or confusion between remote buttons and the immobilizer. Repeating the same sequence without isolating those causes rarely helps.
| Symptom | Likely cause | Corrective action |
|---|---|---|
| No automatic lock cycle | Wrong sequence or open door | Reset the vehicle and verify door-latch status |
| Two lock cycles after button press | Remote rejected | Recheck FCC ID, part number, and timing |
| LOCK works, UNLOCK fails | Wrong board or damaged switch | Test a verified compatible remote |
| Fob LED works but car ignores it | LED only proves button power | Replace battery and confirm vehicle compatibility |
| Fob works, engine will not start | Immobilizer not programmed | Obtain transponder or smart-key service |
| Works only beside the car | Weak battery or antenna issue | Install the specified battery and inspect contacts |
| Existing remotes stopped working | Memory replacement behavior | Re-register every remote during the same session |
| Key starts car but buttons fail | Remote registration missing | Perform remote-only registration if supported |
Battery and contact checks
Install the battery with the polarity shown inside the housing, usually the positive side facing the marked contact, but follow the fob’s molded instructions. CR2032 and CR1620 cells are common Toyota sizes, yet the correct size depends on the remote board; RAV4 battery numbers can include CR2032, CR1632, or CR2016, so verify against the old cell or owner’s manual.
Clean light corrosion from battery contacts with electronics-safe cleaner and a lint-free swab. A bright red or green fob LED does not prove that the transmitter has sufficient range or that the code matches the vehicle.
Practitioner rules that prevent wasted attempts
- Photograph the original FCC ID and board before ordering a replacement. Shell shape is weaker evidence than board identification.
- Register every replacement remote in one session when the procedure may overwrite stored entries.
- Use a fresh battery before diagnosing the receiver. Low voltage can produce intermittent range that resembles a coding problem.
- Never buy a transponder key solely because the blade profile fits. The immobilizer chip, remote board, and programming support must all match.
- If a verified remote is rejected twice, stop repeating the door sequence and verify the vehicle’s receiver, door switches, and model-specific procedure.
Which Option Should You Choose?
Choose DIY manual registration for a compatible keyed-ignition Toyota when at least one working key remains and the replacement remote has matching identification. Choose a mobile locksmith for integrated keys, smart keys, cutting, or lost-key situations, and choose a dealer when factory security access or exact OEM sourcing matters more than price.
DIY is best when
DIY is the lowest-cost route for a remote-only fob and usually takes less than 15 minutes. It is a poor choice when the engine-start transponder must be authorized, the vehicle has push-button ignition, or the source of the replacement remote is uncertain.
A locksmith is best when
A locksmith provides the strongest balance for many owners who need a cut key, transponder, or smart key without dealership towing and scheduling. Confirm the technician supports the exact Toyota year, model, market, and key type before accepting a quote.
A dealer is best when
A dealer is the safest option for newer vehicles, complex smart-key systems, warranty-sensitive owners, and situations involving lost or stolen keys. The trade-off is a higher typical price and, in some cases, a requirement to bring the vehicle to the service department.
How Should You Verify the New Fob?
Verify a newly programmed Toyota fob by testing every intended function at several distances and confirming that the mechanical key and engine authorization work independently. A lock response during registration proves code acceptance, but it does not prove correct blade cutting or immobilizer authorization.
Use this final checklist:
- Press LOCK from 10-20 feet away.
- Press UNLOCK and confirm every intended door responds.
- Test the hatch, trunk, and panic buttons if fitted.
- Lock and unlock from a second distance, such as 30-50 feet.
- Insert the mechanical key and confirm smooth operation.
- Start the engine if the key includes a transponder or smart-key function.
- Test the original remote again if it was previously working.
- Keep the new key away from other RFID devices if the vehicle reports intermittent detection.
A successful remote test does not certify the immobilizer. If the engine displays a key warning or refuses to start, arrange transponder or smart-key programming rather than repeating remote registration.
FAQ
Does changing a Toyota key-fob battery erase programming?
No, replacing the battery normally does not erase a Toyota remote’s stored registration. The battery powers the transmitter, while the vehicle retains the learned identifier. Programming may appear lost if the battery is installed backward, the contacts are bent, the replacement cell is weak, or the remote was already incompatible.
Can I program a Toyota key without the original key?
Sometimes, but not usually through the owner-level door sequence. An all-keys-lost situation may require a mobile locksmith or Toyota dealer with immobilizer equipment, ownership verification, and vehicle-specific security access. Remote-only registration and engine-start authorization also require separate evaluation.
Why does my Toyota key fob work only near the vehicle?
Short range usually indicates a weak battery, poor battery contact, damaged antenna, water intrusion, or radio interference. Replace the specified cell first, inspect the contacts, and compare the result with a known-compatible remote. If both remotes have short range, the vehicle receiver or antenna may need diagnosis.
Can I use a Toyota fob from another vehicle?
A used Toyota fob may be reusable on some systems, but compatibility depends on the FCC ID, board, frequency, protocol, and vehicle programming capacity. A matching shell or identical button layout is insufficient. Smart keys and immobilizer components can have additional restrictions that require professional re-registration.
How long does Toyota key-fob programming take?
Manual remote registration typically takes 5-10 minutes after the correct procedure is confirmed. Integrated keys commonly take 30-60 minutes when cutting and transponder programming are included. Smart-key or all-keys-lost service typically takes 30-90 minutes, with towing and security verification potentially adding more time.
Should I program a replacement remote before cutting the key?
For a remote-only fob, cutting is irrelevant because the remote buttons operate independently. For an integrated key, verify the board and remote compatibility before cutting the blade, because a correctly cut blade does not make an incompatible transponder or remote programmable. This order reduces wasted parts and locksmith charges.
The Bottom Line
How to program a Toyota key fob depends first on the key system, not merely the Toyota badge or model year. Use the manual sequence only for a confirmed compatible keyed-ignition remote, separate button registration from immobilizer programming, and move to a qualified locksmith or Toyota dealer for smart keys, transponders, or all-keys-lost situations. Verify the FCC ID, battery, vehicle response, and every function before relying on the replacement.